Launch an mvTerm session (either new or previously saved).
Select Session, then select Connect to mvBase Server. The Connect to mvBase Server dialog box displays.
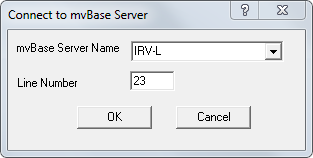
Specify the computer name of the mvBase Server to which you want to connect.
Specify a line number by which to connect, or enter an asterisk (*) to connect to the next available line. (You can also enter -1 for the next available line.)
Log on to a valid account. Once logged on to the account, you may create a customized menu. You can then access this menu from the mvBase Terminal Emulator (mvTerm) menu bar.
Create an item in the master dictionary of the current account using the following commands:
>ED MD itemname TOP .I &menu name #number action &menu entry name]execution command]execution mode - TOP .FI |
Line 1 of the item contains the name of the menu. Line 2 (an optional line) contains the # character, followed by a number indicating the menu number of the menu to perform the action. The action specified in Line 2 may be INSERT, REPLACE, or DELETE. Line 3 contains the name of the menu entry followed by a value mark (Control ']'), the execution command that will be executed by the menu entry followed by a value mark, and the execution mode.
The execution mode may be the following:
The E mode interrupts the process, executes the execution command, and continues by returning to the process.
The W mode assumes the execution command is the name of a Windows program, and launches the program.
If you do not specify the execution mode, the execution command (to be executed by the menu entry) and carriage return will be sent on the data channel, and execution of the command will not occur. More lines may be added after Line 3, specifying additional menu entries.
Specifying the ampersand (&) character causes the letter following the & character to be underlined, enabling the user to enter the underlined letter to select the menu bar name or menu entry name. The & character may appear before any letter in the menu bar name or menu entry name.
A line containing the hyphen (-) character causes a separator to be placed between the menu entries specified on the lines above and below it.