Resizing files
The resizing process works by extending the primary space of the file and rehashing all items. While this process is running, access to the file may be slower, but the file is otherwise available as normal. If the system is rebooted while files are being resized, the resizing process is restarted automatically by the servers. The resizing is done in the background by system threads, running on the servers where the file is located.
The current version has the following limitations that will be addressed in future releases:
The modulo of a file can only be increased.
Note: If the modulo is unchanged, resizing compacts the file instead.After resizing, overflow space is not relinquished to the underlying host file system. The File Manager reports lower overflow usage, but Explorer still displays the .D3O overflow spaces.
There is no command to stop the resizing. It is paused automatically when a sequential access is performed.
The D-pointer does not reflect the new modulo. The nt_file-info command reports the new modulo correctly (see the D3 Reference Manual for more information).
The number of overflow frames reported by the File Manager is actually the combination of the number of frames used by large items and the number of frames used by overflowing groups. It is therefore pessimistic. This version corrects this problem, but a full save of the FSI is required to correct these counters. It is not a critical problem, but it makes determining poorly sized files difficult. A new File Manager option allows finding poorly sized files more accurately.
Procedure
- Right-click the Tables node in the
database to be examined from the Domain Explorer and select the Check Overflow Files option.
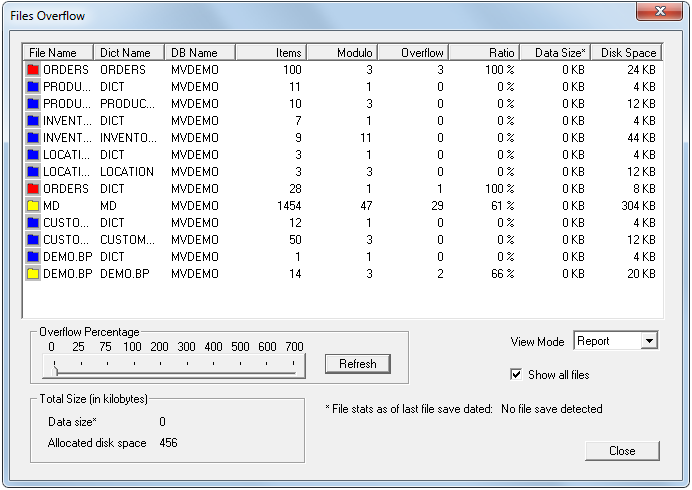
The Files Overflow dialog box displays. Files in the database are represented with a list of color coded icons. Files marked yellow and red may need resizing. See Checking overflow for more information.
- Click the file to be resized.
The General tab of the of the Properties dialog box displays.
Tip: This property information can also be accessed for any table by right-clicking the Tables node form the Domain Explorer and selecting the Properties option.
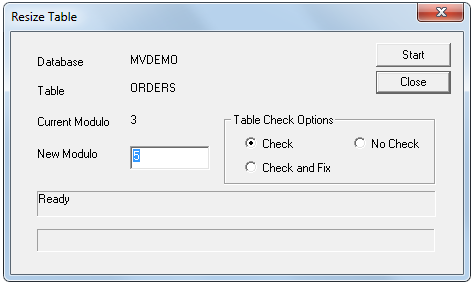
- Type a new modulo in the Modulo text
box and click the Resize button.
Note:
-
Even though the Hash Test dialog box allows testing a non-prime modulo, the resizing process always adjusts to the highest and closest prime number before starting the resizing.
-
The Resize Table dialog box can also be opened from the Hash Test dialog box. See Running a hash test for more information.
The Resize Table dialog box displays.
-