Create a web service resource (data)
Complete these instructions to create a Web Service Resource based on Data.
About this task
- These instructions apply only to Web Services created with the REST Service Type option.
See Create a web service for more information.
- Step 1 is not necessary if you chose to create a Web Service Resource at the end of the
Create a Web Service wizard.
See Create a web service for more information.
Procedure
-
Right-click the Web Service in which to create the new Web Service Resource from the
MV Web Service Explorer and select the Create Web Service
Resource option.
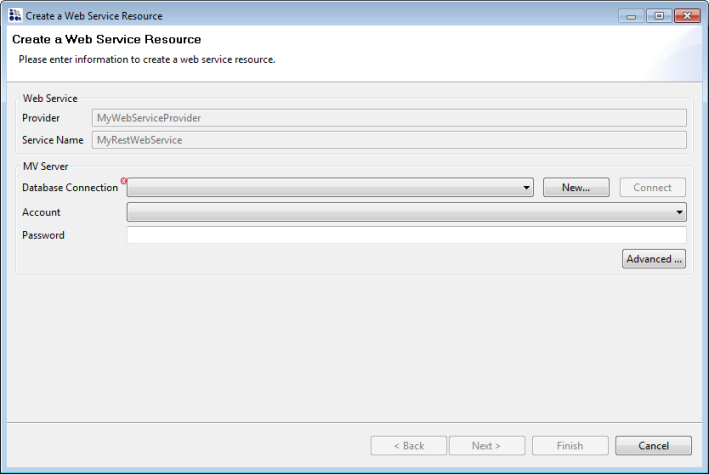
The Create a Web Service Resource dialog box opens.
-
Provide the appropriate values for each of the following parameters, and then click
Next:
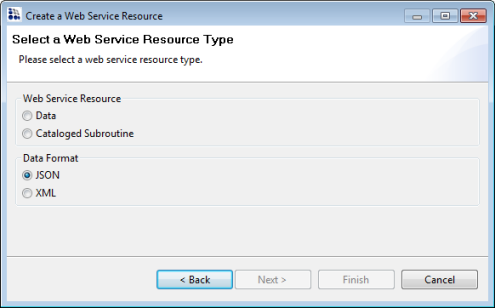
Parameter Description Database Connection Select the database connection that contains the account and data you need to access for creating the resource. Tip: If you need to define a new database connection for the resource you are creating, click the New button to define the connection. When the connection definition has been created, click the Connect button to connect to the database. See Create MV server connections for a description of the required parameters for defining a database connection.Account Select the account that contains the data you need to access for creating the resource. Password Password for the specified account. Advanced Button Opens the Connection Pool Settings dialog box. The following parameters can be specified: Min Connections Minimum number of connections to the D3 or mvBase server. The default is 0. Max Connections Maximum number of connections to the D3 or mvBase server. The default is 0. Idle Timeout Length of time (in seconds) before the connection is dropped due to inactivity. The default is 300 seconds. The Select a Web Service Resource Type dialog box opens:
-
Select Data from the Web Service Resource options and do the
following:
-
Click Next.
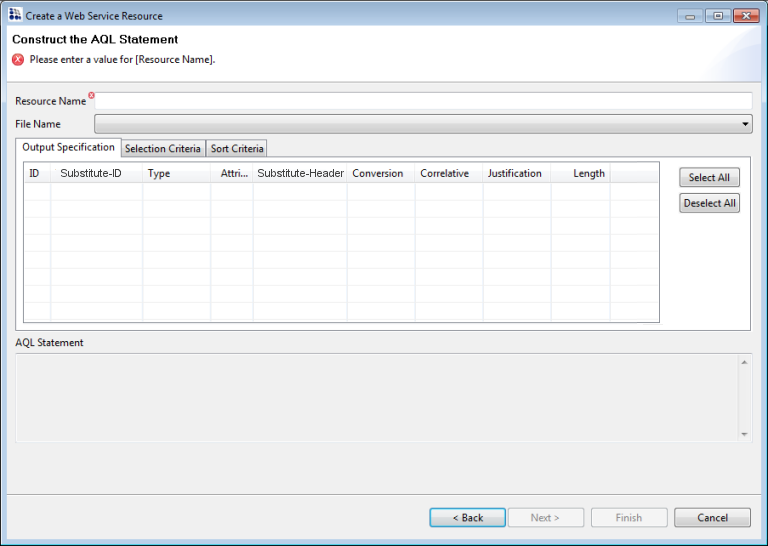
The Construct the AQL Statement dialog box opens.
-
Click Next.
-
Select the file to be queried by the AQL statement you are about to construct from the
File Name drop-down.
The Output Specification tab is populated with the columns contained in the specified file. Also included in the tab are the Substitute-ID , Type, Attribute, Substitute-Header , Conversion, Correlative, Justification, and Length specifications for each of the listed columns.
Tip: The previous 5 steps can be accomplished more expediently by dragging the preferred file from the MV Server Explorer and dropping it into a defined Web Service in the MV Web Service Explorer. This displays the Construct the AQL Statement dialog box (illustrated above) with all of the columns populated. Note that the Resource Name and File Name text boxes will be automatically populated and that the default Data Format will be JSON, but you can change these parameters after post resource creation if you prefer.Also note that the actual AQL statement that you are in the process of constructing displays in the AQL Statement section of the screen (below the tabs section). The AQL statement displayed changes dynamically to match any changes you make to the Output Specifications, Selection Criteria and Sort Criteria.
Tip: Click on column headers to sort the list ascending or descending by the data in that column.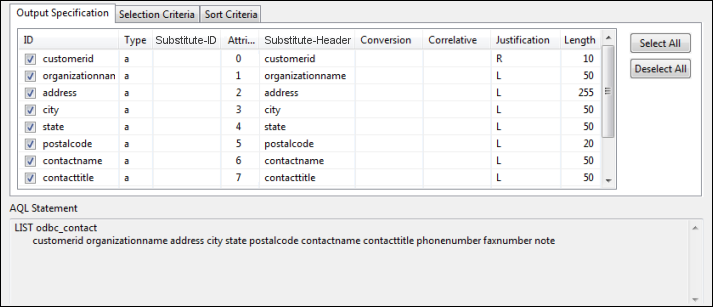
-
Select the Selection Criteria tab to specify any selection criteria
you want to include in the AQL statement.
- Click Add to add a new selection criteria to your AQL statement.
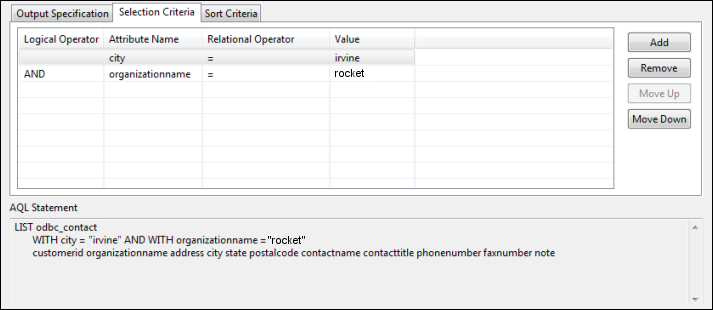
After clicking Add, specify your criteria by clicking in the applicable table cells beneath the Attribute Name, Relational Operator and Value column headings. If multiple selection criteria clauses are added, a Logical Operator must also be specified.
Note: In the Value column, you can enter a literal value or create a variable to be passed to the AQL statement. To create a variable, the value must begin with the @ character (for example, @STATE). This will then create a variable named STATE and its value will be supplied in the REST request. Web Service Resource variables are listed in the web service test dialog allowing you to provide a value prior to executing the resource. - Click Move Up and Move Down to change the order of the selection criteria in your AQL statement.
- Click Remove to remove a selection criteria clause from your AQL Statement.
The example below illustrates a sample selection criteria specification.
- Click Add to add a new selection criteria to your AQL statement.
-
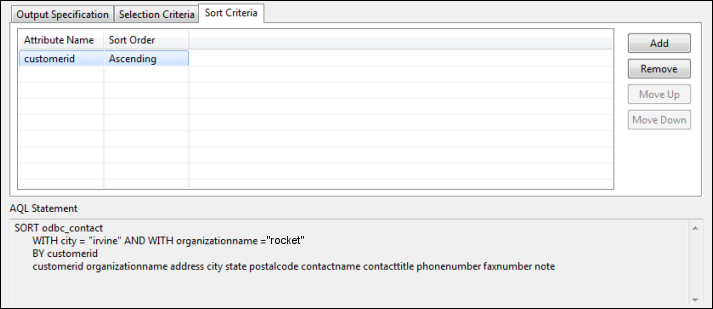
Select the Sort Criteria tab to specify any sort criteria you want
to include in the AQL statement.
- Click Add to add a new sort criteria to your AQL statement. After clicking Add, specify your criteria by clicking in the applicable table cells beneath the Attribute Name and Sort Order column headings. Multiple sort criteria clauses can be added.
- Click Move Up and Move Down to change the order of the sort criteria in your AQL statement.
- Click Remove to remove a sort criteria clause from your AQL statement.
The following example illustrates a sample sort criteria specification.