Activating D3

If you chose not to activate D3 during the installation process, you can perform the activation using these instructions.

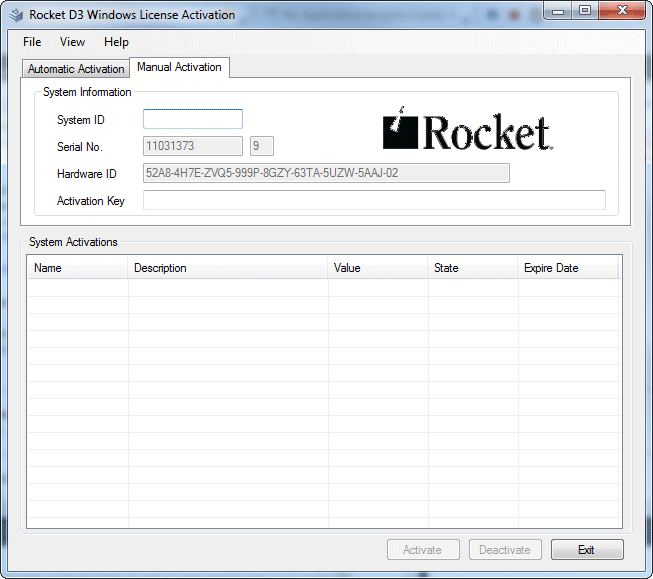
These instructions illustrate a manual activation. To perform the automated activation, select the Automatic Activation tab, enter your System ID and Email Address in the appropriate text-boxes, and then click Activate. The activation will then be performed automatically.

Procedure

  1. Select All Programs > Rocket D3 > Activation from the Windows Start button.

    The Rocket D3 Windows License Activation dialog box displays.

  2. Select the Manual Activation tab.

    The Manual Activation tab displays.

  3. Type your 8-digit System ID in the System ID text box. Your System ID was provided via email at the time of your purchase.
    Note: The value contained in the Serial No. and Hardware ID fields cannot be changed and is for informational purposes only.
  4. Contact Rocket Customer Support or use Web activation to obtain your Activation Keys.
  5. Enter your first Activation Key in the Activation Key text box, then click Activate.

    The Activation displays in the System Activations list box.

  6. Repeat step five for each Activation Key that was provided by Rocket Customer Support or Web activation.
  7. Click Exit when you finish entering all of your Activation Keys.
    Tip: If you ever need to move the D3 Windows Server to a different machine, you can deactivate the current system by using the Deactivate button. See Deactivating D3 for more information.