This procedure is intended for a new, first time installation of BlueZone. If an older version of BlueZone is already installed
on the target machine, refer to
Upgrade BlueZone. If you already have BlueZone installed and you want to add or remove a BlueZone component or feature, refer to
Modifying BlueZone.
BlueZone is provided on a CD-ROM or in the form of a CD image. The installation follows standard Windows installation procedures.
|
1. |
Insert the BlueZone CD-ROM into your CD/DVD drive. The BlueZone CD automatically launches the Welcome to BlueZone screen.
|
|
2. |
Click BlueZone Desktop. A second BlueZone Desktop link appears.
|
|
3. |
Click BlueZone Desktop. The Chose Setup Language window opens.
|
|
4. |
Select the desired language from the drop-down menu and click OK. The Preparing to Install window opens followed by the Welcome window.
|
|
5. |
Click Next to continue. The BlueZone Software License Agreement window opens.
|
|
6. |
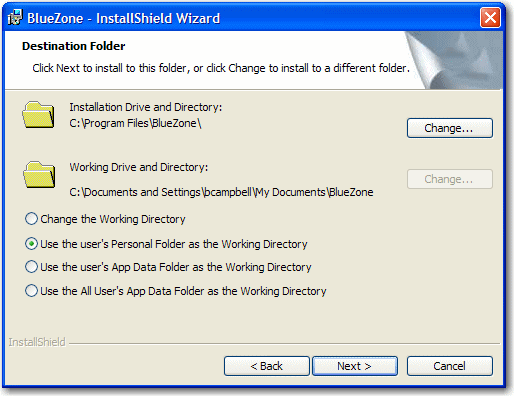
Select the I accept the terms in the license agreement radio button and click Next. The Destination Folder window opens:
|
|
7. |
It is recommended that you let BlueZone determine the Installation Drive and Directory and the Working Drive and Directory. Click Next.
Note If you are an experienced user, you can click Change and manually type the appropriate paths or browse to these paths as needed. It is recommended to use the default setting.
If you are installing BlueZone on a Windows 2000 or Windows XP workstation that is shared by more than one user, select one
of the following options:
|
• |
Use the default value Use the user's Personal Folder as the Working Directory radio button so that each user can store their settings, configurations and script files in their own My Documents folder,
or
|
|
• |
If you want all users of this workstation to share the same settings, unselect the Use the user's Personal Folder as the Working Directory and select the Use the All User’s Data Folder as the Working Directory radio button.
|
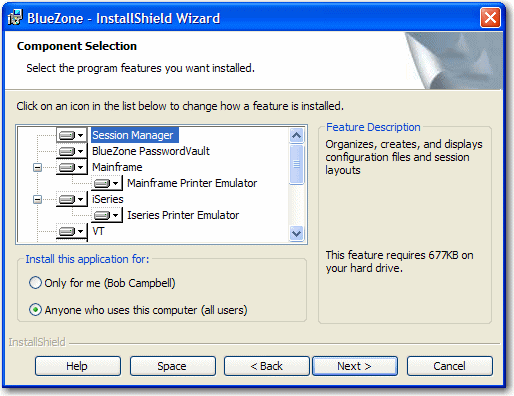
The BlueZone Components window opens as shown here:
|
a. |
Review the default selections. Use the scroll bar to view all components. By default, some BlueZone components are selected for installation and some are
not. The components that have a diskette icon are installed and the components that have a red X icon are not installed.
Note For a description of a particular component, highlight the component and read the Feature Description on the right side of
the screen.
|
|
b. |
Determine the components you want to install. |
|
c. |
Click on each component and set the desired installation option. Each component has three options:
|
• |
This feature will be installed on local hard drive. |
|
• |
This feature, and all subfeatures, will be installed on local hard drive. |
|
• |
This feature will not be available. |
|
|
d. |
In the Install this application for section, select one of the following options:
|
• |
Anyone who uses this computer (all users) |
|
|
|
8. |
Click Next. The Choose Activation File window opens.
|
|
9. |
Click Browse to locate your Software Activation File. Once you have it selected, click Next.
Note If you do not have a Software Activation File at this time, you can skip this window by clicking Next. You can manually copy your Software Activation File to your BlueZone installation folder later.
Note Single user license holders: If you have purchased a BlueZone single user license, you do not receive a Software Activation
File; you receive a BlueZone Installation Key instead. Single user license holders must run the SEAGULL Registration Wizard
to complete the installation process. Refer to Registering BlueZone for more information.
The Ready to Install the Program window opens.
|
|
10. |
Click Install to proceed with the installation. The Installing BlueZone window opens.
|
|
11. |
When the installation is complete, click Finish. |