You have the option of creating Batch File transfers. Batch file transfers are two or more individual file transfers that you configure, which can be launched by clicking one button.
The following topics are covered on this subject:
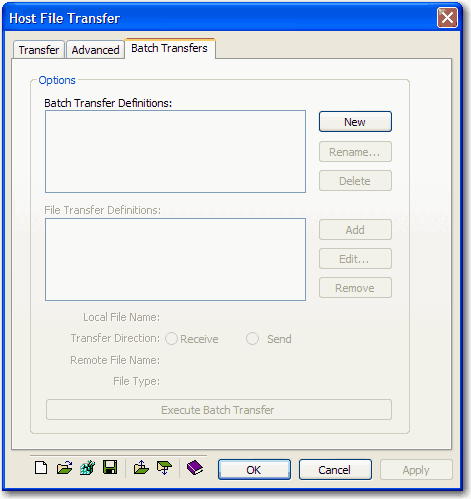
To configure Batch File Transfers, select Transfer:Configure from the BlueZone MenuBar , then select the Batch Transfers tab. The Batch Transfers dialog will be displayed as shown:

To create a batch file transfer:
Click the New button. BlueZone will automatically assign the name Batch Definition #1 to this particular batch definition.
You can keep this name, or you can change the name of the batch definition by clicking the Rename button.
To add your first transfer to the batch, click the Add button. BlueZone will automatically assign the name File Transfer #1 to this particular transfer.
Click the Edit button to configure this transfer definition.
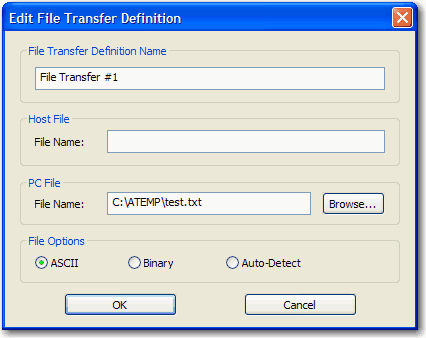
At this time, you can edit the name of the transfer definition if you wish. Fill in the desired file transfer information as shown above and click the OK button.
Make sure that you have the correct Transfer Direction selected for this transfer definition as shown:
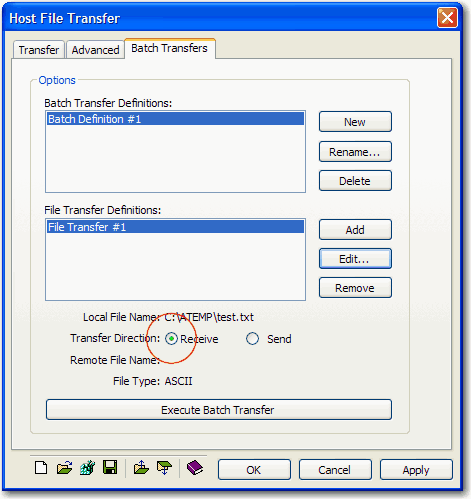
In the above example, File Transfer #1 of the batch, the host will be receiving a file from the PC.
Add the next file transfer definition to the batch by clicking the Add button. BlueZone will automatically assign the name File Transfer #2 to this particular transfer definition.
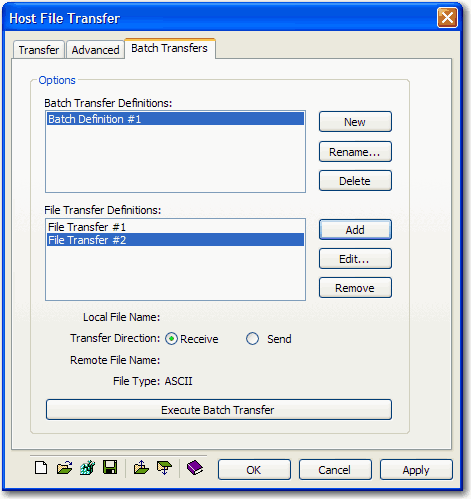
Click the Edit button to configure this transfer.
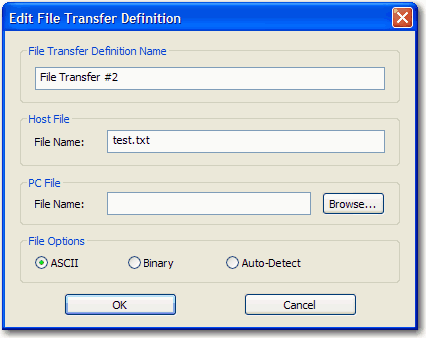
At this time, you can edit the name of the transfer if you wish. Fill in the desired file transfer information as shown above and click the OK button.
Highlight file transfer #2 and make sure that the correct transfer Direction is selected as shown:
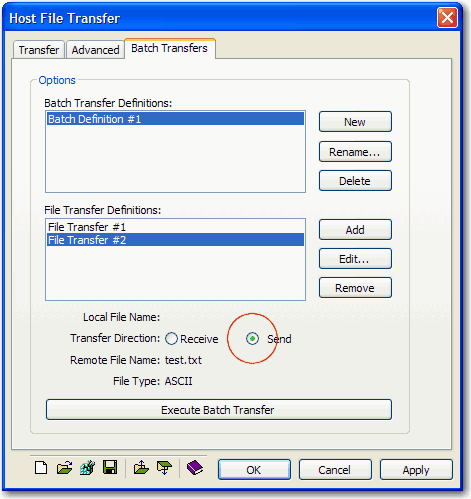
In the above example, File Transfer #2 of the batch, will be sending a file from the host to the PC.
Add any additional file transfers to the batch definition as shown above.
Create any additional Batch File Transfer definitions you may require by repeating the steps above.
To execute a Batch File Transfer, highlight the desired batch in the Batch Transfer Definitions window and click the Execute Batch Transfer button.
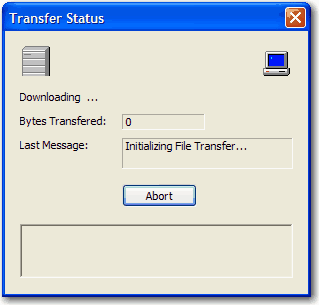
A Transfer Status dialog will be displayed showing the progress of your file transfer. Click the Abort button if you wish to abort the file transfer.
You can save Batch File Transfers for the purposes of managing multiple batches or you can save them so you can share them with other BlueZone users.
To save a Batch File Transfer configuration to a file, select Transfer:Configure from the BlueZone MenuBar, then select the Batch Transfers tab. The Batch Transfers dialog will be displayed.
Click the
Export icon ![]() located
on the Host File Transfer ToolBar,
located at the lower left hand corner of the dialog as shown:
located
on the Host File Transfer ToolBar,
located at the lower left hand corner of the dialog as shown:

A standard Windows File Save dialog will be displayed.
Enter a name for this configuration and click the Save button. BlueZone will automatically assign the correct file extension (.vdf) to this file. The file will be stored in the BlueZone\Config folder.
You can import Batch File Transfers that have been previously saved.
To import a Batch File Transfer configuration, select Transfer:Configure from the BlueZone MenuBar , then select the Batch Transfers tab. The Batch Transfers dialog will be displayed.
Click the
Import icon ![]() located
on the Host File Transfer ToolBar,
located at the lower left hand corner of the dialog as shown:
located
on the Host File Transfer ToolBar,
located at the lower left hand corner of the dialog as shown:

A standard Windows File Open dialog will be displayed.
Locate the configuration file that you wish to import, highlight the file and click the Open button.
Related Topics: