Setting up an ODBC data source
Follow these steps to set up an ODBC Data Source.
Procedure
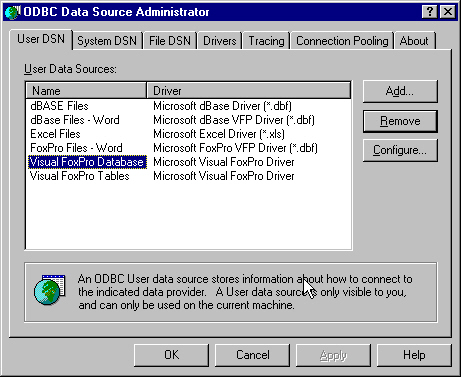
- Double-click the ODBC Data Sources icon from the Administrative Tools window.
The ODBC Data Source Administration dialog box displays.
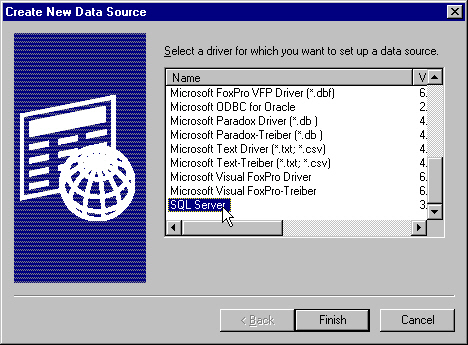
- Click Add, and then click Finish.
The Create New Data Source dialog box displays.
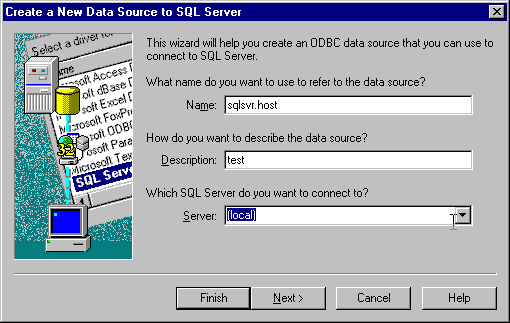
Now that the Microsoft SQL Server has been added to the user data source, the Create a New Data Source to SQL Server dialog box displays.
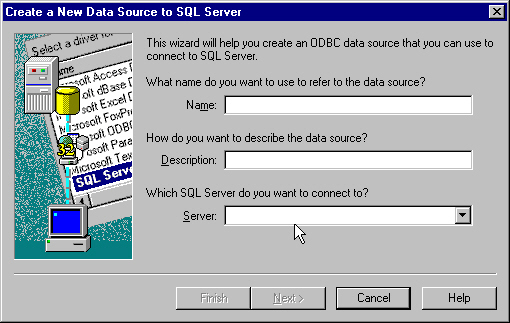
- Type the following information in the Create a New Data
Source to SQL Server dialog box and click Next:
-
Name of the data source
-
Description of the data source
-
Name of the SQL Server
For example:
The dialog box below displays to verify the authenticity of the login ID.
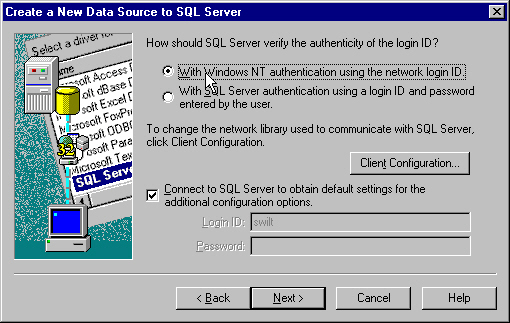
-
- (Optional) Select the Connect to SQL Server
to obtain default settings for the additional configuration options check box.
The dialog box below displays.
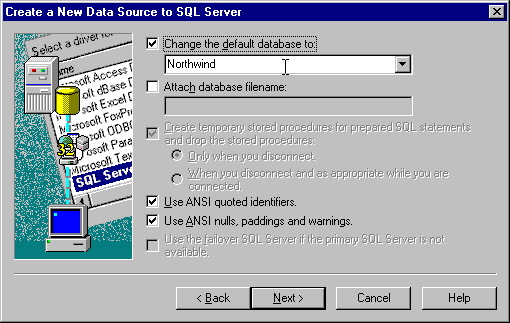
- Click Next.
The dialog box below displays.
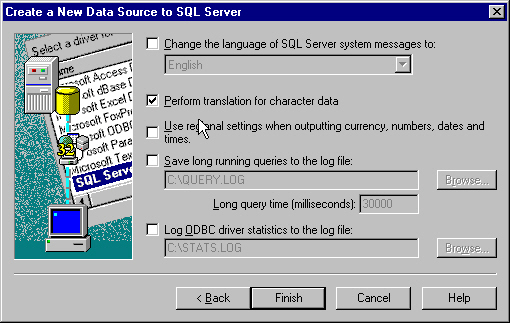
- Select the Perform translation for character
data check box, and then click Finish.
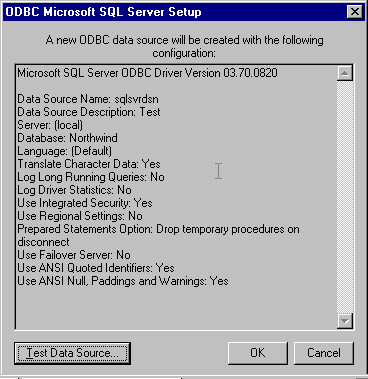
The ODBC Microsoft SQL Server Setup dialog box displays.