You must install the JRE or Java SDK on your Web server. The FlashConnect Socket Server requires JRE 1.4 or later (located on the product CD in the FlashConnect directory).
NOTE |
|
To install the JRE:
Log on to Windows as an Administrator (or a user with administrative privileges).
Insert the product CD into the CD-ROM drive.
NOTE |
If the Installation Menu does not display, open Windows Explorer, go to the CD-ROM drive, and double-click on SETUP.exe. |
The Installation Menu dialog box displays.
Click Java Runtime Environment.
The JRE unpacks and runs the setup for the standard edition. The License Agreement dialog box displays.
Review the license agreement, select I accept to agree to the terms of the agreement, and then click Next.
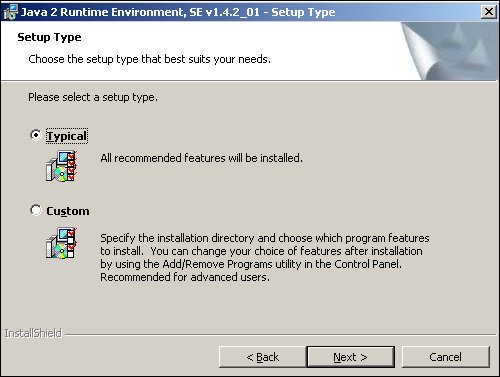
The Setup Type dialog box displays.
Select Typical to accept the default components, then click Next.
Click Finish to complete the installation.
The Java JAR files are created and the installation is complete.
WARNING |
Do not copy or move the jvm.dll to the WINNT folder from its original installation folder because it causes the FlashConnect Socket Server Manager to fail. |
Ensure the path environment variable contains the JRE 1.4 directory.
Restart the system.
Test the JRE connection.
See Also