Defining Map Widgets
Use the map widget to define areas of an image that are potentially sensitive to mouse action.
- Set the component field's Widget Type to
Map. - Set the size and position of the field by drawing it in the layout editor or setting the properties.
- In the Properties Inspector, click the ellipsis of the FRM Widget Properties.
- Specify the Image Type and select an image to use for the map. The image is displayed in the Preview field.
-
Define the areas (polygons) of the image that are potentially sensitive to mouse action. To do so:
- Click the >> button in the Preview field.
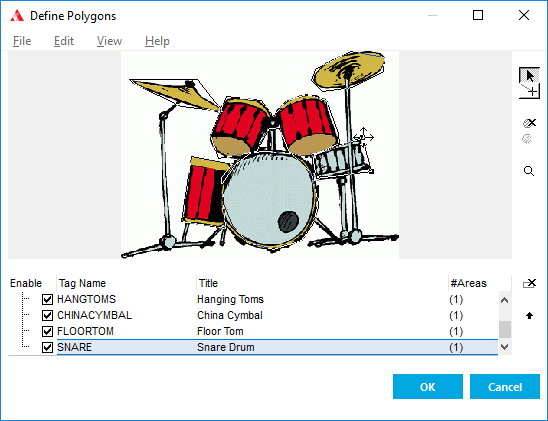
- In the Define Polygons dialog, select the Draw Mode cursor and draw a polygon on the image, releasing the mouse for each point of the polygon.
- For each polygon you define, specify its associated Tag Name and Title, and use the Enable check box to specify whether a tag is available to the user at runtime.

At runtime, the titles of the polygons can be displayed in the tool tip as the user moves the cursor over it, or in a pop-up menu.
- Set the remaining widget properties for the map widget. for more information, see umap (Map).
