Basic configuration tutorial
The purpose of this tutorial is to walk you through the complete process of creating a site, launch folder, and one BlueZone
3270 Mainframe emulation client session that automatically connects to your host when launched. Advanced BlueZone Web-to-Host's
features are not covered in this tutorial.
This tutorial assumes that you do not have a web server running on this machine and that you want to use the built-in web
server provided with the Web-to-Host Wizard.
Note
You can substitute a different BlueZone emulation client like the iSeries Display or BlueZone VT Display. However, you should
be aware that the BlueZone configuration screens may look slightly different.
| 1. | Double-click the BlueZone Web-to-Host Wizard icon  to launch the Web-to-Host Wizard that was created during the installation process. to launch the Web-to-Host Wizard that was created during the installation process. The Sites dialog opens.
|
| 2. | Click Create. A Windows common file dialog opens with the default path for the location of the site.
|
| 3. | If the default location is acceptable, proceed with the next step. Otherwise, use this dialog to navigate to the location where you want to store the site. |
| 4. | Once you have decided on a location, give the site a name and click Open: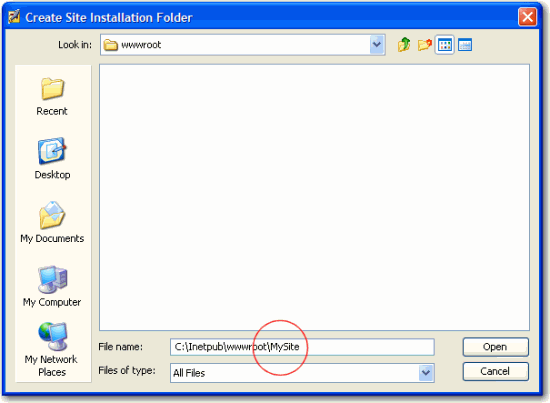 A confirmation box opens.
|
| 5. | Click OK. In this example, a site named MySite is created. The Sites dialog displays again with the newly created site listed:
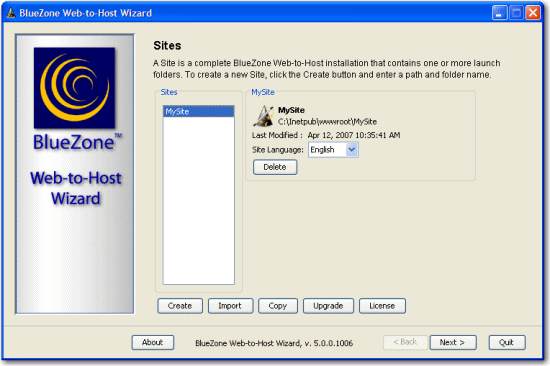 Note The Site Language setting controls the language version of the BlueZone emulation client for that particular site. For example, it is possible
to create one site that launches the English version of the BlueZone Mainframe Display emulator and another site that launches
the French version of the BlueZone Mainframe Display emulator.
|
| 6. | Click Next. The Launch Folders dialog opens.
|
| 7. | Click Create. The New BlueZone Launch Folder dialog opens.
|
| 8. | In the Folder Name field, type a launch folder name. This example uses the folder name TestFolder.
|
| 9. | Leave the Folder Options set to Distribute as Standard Web-to-Host. Refer to Deployment mode options for more information about the folder options.
|
| 10. | Click OK. The launch folder is created and the Launch Folders dialog opens:
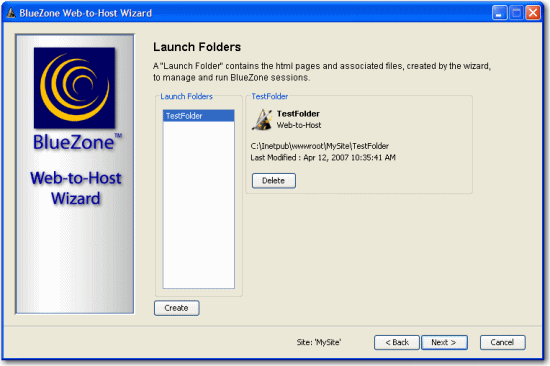 |
| 11. | Click Next. The Sessions dialog opens.
|
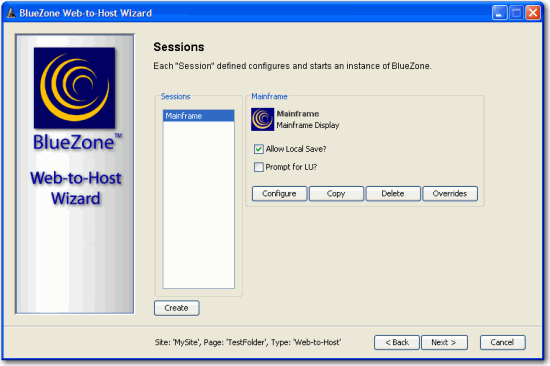
| 12. | Click Create. A New BlueZone Session dialog opens.
|
| 13. | Select Mainframe Display from the drop-down list box and click OK. A new dialog box opens prompting you for the Session Name.
|
| 14. | Type a session name. This example calls the session Mainframe. Do not select the Use existing profile? check box. In the Options section, leave the Allow Local Save? check box selected. |
| 15. | Click OK. At this point, since you created a BlueZone Mainframe Display profile that did not previously exist by typing in the session
name "Mainframe", a BlueZone Mainframe Display session is automatically launched so that you can configure this brand new
session. A progress bar is displayed and when finished, the BlueZone session launches and automatically prompts you to define
a new connection. Type the necessary information in the Define New Connection dialog.
|
| 16. | Type a Connection Name, Host Address, LU Name (if required), and change the TCP Port if it's not port 23, then click OK. Click OK again to exit the TN3270E Properties dialog. You are now on the Session Configuration dialog. |
| 17. | Select the Auto-Connect Session check box. Click OK. |
| 18. | Now that the BlueZone session is running, this is where you would make any customizations to the BlueZone emulation client. If you are not that familiar with BlueZone or you don't want to spend the time to completely customize the BlueZone session now, you can come back to this point and finish the customization process any time you want. |
| 19. | Close down the BlueZone Mainframe Display session. Click Yes to the save changes to session settings. The Sessions dialog displays with the name of the session you just created at the top of the Sessions window:
 |
| 20. | Click Next. The Advanced Settings page displays.
This page has buttons which allow you to make advanced configuration changes to your sessions. For this tutorial, we're not
going to make any changes on this page.
|
| 21. | Click Next. The Test Launch Folders dialog displays:
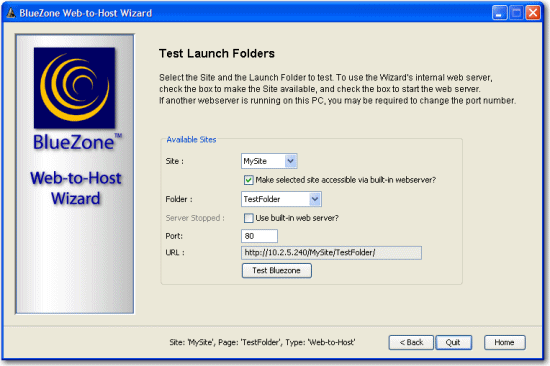 |
| 22. | In the Available Sites section, ensure that the Make selected site accessible via built-in web server? and Use built-in web server? check boxes are selected. Note If you get the following message, you probably have a web server running on this machine.
You cannot have two web servers using the same listening port. If you still want to use the built-in web sever for testing,
change the port to something other than port 80 (try 8080 for example) and try selecting the check box again.
|
| 23. | Click Test BlueZone. Your default web browser launches and opens the launch folder you have selected in the listbox.
After a few seconds, a security warning appears asking if you want to install the Web-to-Host control module v4.
|
| 24. | Click Install. The Web-to-Host control module installs and displays a progress bar showing the downloading of the BlueZone emulation client
files.
The launch page you created page contains a launch pad with an icon representing the BlueZone session that you created:
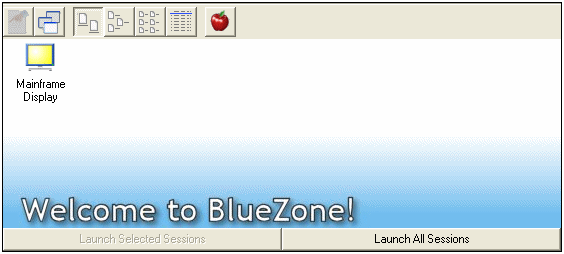 |
| 25. | To launch the session you created, double-click the Mainframe session icon. Another security warning appears asking if you want to run BlueZone Mainframe Display.
|
| 26. | Click Run.
Your BlueZone session immediately launches and if configured correctly, automatically connects to your host.
Note These security warnings are only presented the first time you download and launch a particular BlueZone emulation session.
|
To exit the Wizard, click Quit.