MVS Installation GuideInstalling MVSInstall MVS using the graphical interface
Install MVS using the graphical interface
Use these instructions to install the MVS using the graphical interface.
About this task
This installation type is supported on Windows only.
Procedure
- Download the MVS toolkit from the Rocket Customer Portal.
- Locate the MVS Windows application folder and double-click RocketMVSSetup.<version>.exe (where <version> is the version and build number in x.x.x.xxx form) to launch the MVS Installation wizard.
-
On the Introduction screen, click Next.
-
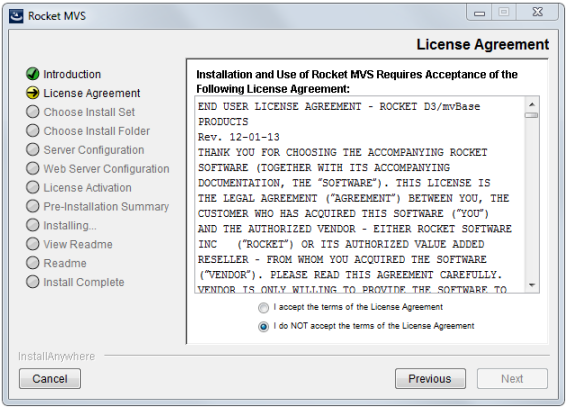
On the License Agreement screen, complete the following steps:
- Review the license agreement.
- Select the I accept the terms of the License Agreement option.
- Click Next to accept the terms of the agreement.
-
On the Choose Install Set screen, select one of the following options:
- Typical: Click Next and go to Step 11.
If you select the Typical option, MVS will be installed with the default components, install path, and server and web server configurations.
- Custom: Click Next and go to Step 6.
If you select the Custom option, MVS will be installed with your choice of components, install path, and server and web server configurations.
See Before installing MVS for more information on the available options.
- Typical: Click Next and go to Step 11.
-
On the Select Rocket MVS Install Components screen, select the components to install
and click Next.
See Before installing MVS for more information.Note: The example images in this section illustrate the Windows graphic installer. The Linux graphic installer is identical except for the default install path, which is /usr/local/RocketSoftware/mvs.
- On the Choose Install Folder screen, click Choose to specify a different installation folder and click Next.
-
On the Choose client configuration files folder screen, complete the following steps:
-
Click Choose to specify the installation folder for the client
configuration files.
The default is the Users home directory.
- Ensure that there are no blank spaces in the specified directory.
- Click Next.
-
Click Choose to specify the installation folder for the client
configuration files.
-
On the Server Configuration screen, enter the server port number in the Server
Port text box and click Next.
See Before installing MVS for more information on these configuration values.
-
On the Web Server Configuration screen, complete the following steps:
-
Enter the following information in the appropriate text boxes:
- Web Server name
- Web Server port
- Maximum concurrent requests
-
Click Next.
See Before installing MVS for more information on these configuration values.
-
Enter the following information in the appropriate text boxes:
-
On the Pre-Installation Summary screen, click Next to install
MVS.
-
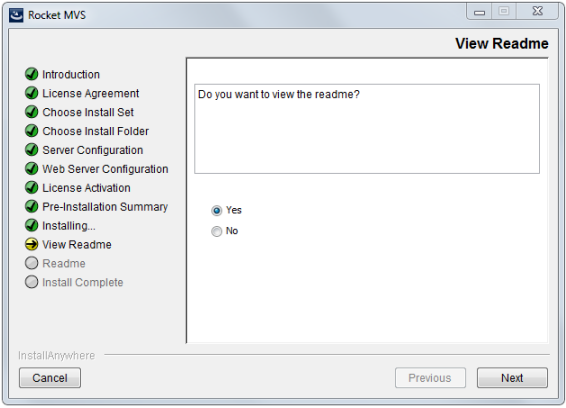
On the View Readme screen, complete the following steps:
- Select the Yes option to view the Readme (recommended) or select the No option to skip this step.
- Click Next.
-
On the Install Complete screen, click Done.
The Rocket MV Web Service starts automatically when the MVS installation is complete.
Parent topic: Installing MVS