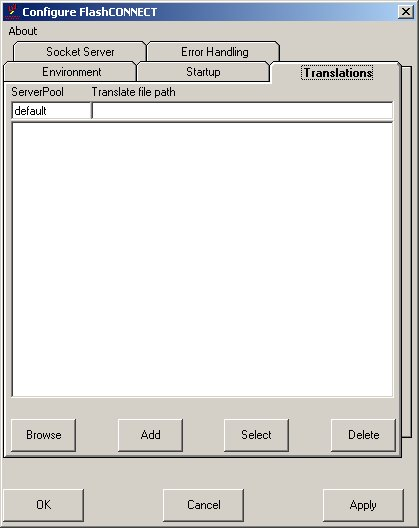
The Character Translation component (located in FCConfig.exe) allows the D3 data structure to handle Unicode data.
The character translation component is part of the installation process.
The FCXlate parameter in the FlashConnect.conf file specifies a list of server pool names and paths to translation files used by FCService when processing inbound and outbound data.
poolname1,path1;poolname2,path2;...poolnameN,pathN
For example:
PN1,/etc/pnxlate1.txt;default,/etc/defaultxlate.txt
In this example, two server pools are translated; the first server pool is PN1 and it is translated according to the declarations in the file /etc/pnxlate1.txt. The second server pool is the default server pool and it is translated according to the file defaultxlate.txt. Multiple pool names may reference the same translation file.
|
NOTE |
There is no validation performed on the paths. If the specified file does not exist at run time, then no translation module is set up and no run-time error is generated. |
Each translation file contains a translation map that is used by FCService. This feature operates in two modes:
|
1 to 1 |
Translates one byte to one other byte. |
|
1 to 2 |
Translates one byte to an escape byte followed by another byte. |
Each line of the map file contains one character translation hex pair separated by a direction code. These pairs must start in column 1 and anything after the translation pair or escape character definition is taken to be a comment.
To enable character translation:
Select Start > Programs > TigerLogic > FlashConnect > Configure from the Start Menu.
The Configure FlashConnect dialog box displays.

Select the Translations tab.
Type a name for the server pool in the ServerPool text box.
This field initializes to Default.
Type or browse to the translate file path.
For example:
C:\Program Files\FlashConnect\FCXlate.txt.
Click Add.
Repeat steps 3-5 to add additional server pools.
(Optional.) Click Apply to save this information to the registry without closing this dialog box.
Click OK.
|
NOTE |
Use the Select button to select an existing server pool entry to edit. This also this allows you to add another server pool using the same translation file. |
See Also