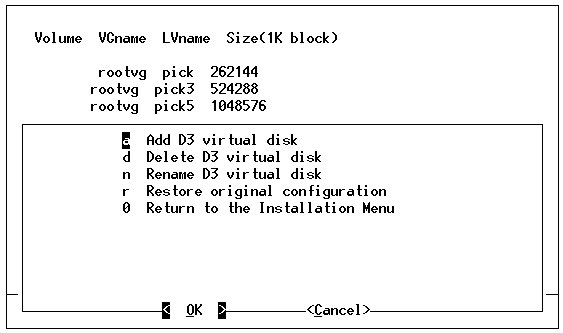
Edit and modify the system's disk usage in the D3 virtual disk menu. This menu is an option or submenu of the Display/Modify D3 configuration menu.
The D3 virtual disk menu allows the user to edit and modify the system's disk usage. The options are described below.
|
Add D3 virtual disk |
Use this option to create a virtual disk. TIP—This option can be used to create a mirrored logical volume.
The default volume group is followed by <<. Press ENTER to select the default volume group.
If the name entered is a logical volume on the specified volume group, the logical volume is used. To avoid conflicts with AIX logical volume names, do not select names starting with lv, hd, or paging.
The total available free space is shown.
The size of a logical volume cannot exceed 2 GB (2,097,152 KB). If more than 2 GB is needed for the file space, create several logical volumes until the sizes total the desired size. Up to 64 logical volumes can be specified in the configuration file.
|
||||
|
Delete D3 virtual disk |
Use this option to remove a virtual disk from the list.
Type the name of the volume to be deleted, and press ENTER. To change the size of a virtual disk, first delete it, then create it with the required size. Note that the addition/deletion takes place only when the Install D3 with current settings option in the D3 Installation menu is selected. |
||||
|
Rename D3 virtual disk |
Use this option to rename a virtual disk.
Type the name of the volume to rename and press ENTER. |
||||
|
Restore original configuration |
Cancels changes made during this session and restores the original values. |
||||
|
Return to the Installation Menu |
After the new configuration has been set, from the D3 virtual disk menu, enter 0 to return to the Display/Modify D3 configuration menu. This menu displays all changes made. |
See Also