By default, BlueZone is not configured for secure SSL or
TLS encrypted sessions. In order to establish a Secure host connection,
you will have to configure the security settings in BlueZone.
Note: Keep in mind that your Telnet host must be capable of negotiating a secure Telnet session,
using TLS v1.0, TLS v1.1, TLS 1.2, or SSL v3. If your host is not secure Telnet-capable, one
option is to use a product like BlueZone Security Server in front of your host to perform
the Telnet encryption and decryption functions.
To enable SSL encryption in BlueZone, follow this procedure.
- From the BlueZone menu bar, click .
- Click Properties.
- In the Connection List, highlight
the session that you want to secure and click Edit.
If you don't have any existing sessions, or you want to
create a new one, click New.
- Edit the Host Address and the TCP
Port if necessary.
Your Telnet host administrator gives you the correct values
to use.
- Click OK to close the dialog.
- Click the Security tab.
The Security dialog displays.
-
From the drop-down list box, select either Implicit TLS (for a fixed
port) or Explicit TLS (for a telnet-negotiated secure port).
-
Select the Minimum TSL version. This should be set to the
minimum acceptable version of the TLS protocol.
- SSL v3
- TLS v1.0
- TLS v1.1
- TLS v1.2
SSL v3 is the least secure (not recommended), TLS v1.2 is the most secure. The highest
version that can connect to the host should be selected.
- Determine how you want to handle Invalid certificates.
It is recommended to select Ask before Accepting until
you are sure you can use one of the other settings.
-
Select a preferred CipherSuite only if directed by you host
administrator.
By leaving it set to Strong only, BlueZone automatically
negotiates the highest encryption that both BlueZone and the host can support.
- Click OK twice to close out all
dialogs.
Now that you have BlueZone configured, you are ready to make a secure connection with your
host.
From the BlueZone menu bar, click or click the Connect icon located on the BlueZone
toolbar.
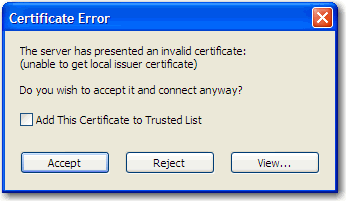
At the start of a secure Telnet connection, a negotiation takes place. Part
of the negotiation is to examine the certificate that is being presented by the host. You
may get a warning message like this:
This message is normal if you are
using a self-signed certificate like the one that comes with BlueZone Security Server. In
some situations this can be perfectly acceptable.
Tip: If you are using
encryption to allow secure remote Telnet connections from users that are not employees of
your organization, like your customers, you may want to consider purchasing a verified
certificate from a Certification Authority (CA). Using a verified, rather than a
self-signed certificate, gives confidence to your remote users that they are indeed
connecting to the correct Telnet host and that their information is encrypted and secure.
It also prevents an invalid certificate error.
To make these messages go
away, follow these steps:
When the Certificate Error message opens and you are sure
that you trust the issuer of the certificate, enable the Add this Certificate to
Trusted List check box. When the certificate is in your trusted list, this
error message no longer opens.
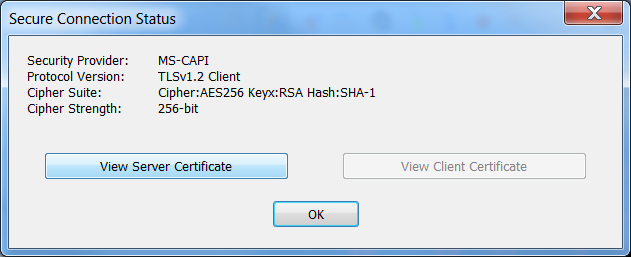
When you are connected, the Secure Connection Status
icon displays in the BlueZone status bar, as shown here:
You can click the Secure Connection Status icon to open the Secure Connection
Status dialog, as shown here:
This is an easy way to verify the type and strength of your encryption. It also
allows you to view the certificate that was presented by the host Telnet server. In
addition, if you are using client certificates, you can view that as well.