Getting table information
When you have information in the legacy screens in table format, you can use the HFLI to define the table area and return
the table content as an output parameter. Tables can only be defined as output parameters and cannot be defined as input or
temporary parameters.
Follow the steps below to define a table.
| 1. | While recording and while you are on the screen that has the table, hold down the CTRL+SHIFT keys and drag with the mouse a rectangle around the table area including the header line. |
| 2. | Release the SHIFT key while keeping the CTRL and the mouse button held down. |
| 3. | Drag the mouse to the Output node while keeping the CTRL key held down. |
| 4. | Release the mouse and the CTRL key over the Output node. |
The content of the table will be returned by the resulting code to its calling object as a System.Data.DataTable.
You can change your First Raw and Last Raw numbers form the respective properties in the Properties grid.
Follow the steps below to test your table definition and customize it:
| 1. | Select the table output you just created above in the tree. |
| 2. | Click on the ellipsis next to the Fields property in the Properties grid. This opens a wizard that allows you to customize the width of the columns, their titles, and which
one you want returned.
Note You must be connected and the same screen that has the table for the following dialog box to show the data.
 |
| 3. | You can change the widths of the columns by using the mouse on the ruler at the top of the wizard dialog. Adjacent cells with
the same color belong to the same column. The available colors are red, green and white. A white cell is not selected (will
not be returned).
|
| 4. | To change a title of a column, click on its name in the Name column and edit the name there. |
| 5. | If you click on the Show button, you will be able to see how the data will be returned in a grid view format. This helps you get a final view of your data as it will actually be displayed at run time. |
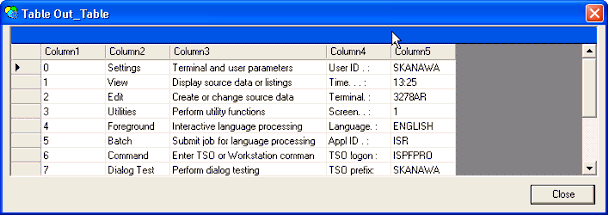
If you have defined a table spanning multiple screens, this view will show only the data from the first one.