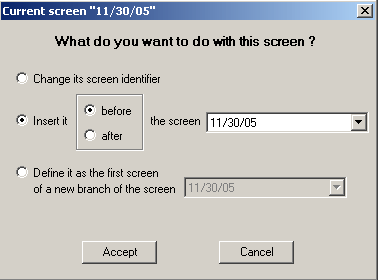
There are two ways for adding a branch to a navigation. The first requires an active session to be connected and the second
one does not.
Method one:
This methods works when you have already recorded some screens that do not include the branch screen and then you replay the
recording using an environment or parameters that allow the branch screen to show. This method require you to be connected
to the host session.
To add a branch, follow the steps mentioned below. If the screen displayed in the emulation window does not match the current
tree screen, then this screen can be added as a branch to this node.
|
1. |
Connect to HostFront and then navigate to a screen. Make sure the screen matches the screen displayed in the emulation window.
Notice that the branching button is not enabled in the toolbar. |
|
2. |
Select another screen in the navigation tree (that does not match the active displayed one). You will notice that the branching
button is now enabled. |
|
3. |
Click the branching button in the toolbar and confirm your choice in the dialog box. A Branch node will be added to the navigation
tree and the first screen of the branch will be the current one in the emulation window.
|
|
4. |
Change the definition of the branch screen to match exactly the first screen of the branch. |
Method two:You can use this method off-line while you are not connected to the host. This method assumes that you have already recorded
the screen that you want to include in a branch but it is currently part of the main navigation.
To a branch at a certain screen, follow the steps below:
|
1. |
Select the screen that you want to include in a branch. |
|
2. |
Click the Branch button.
|
|
3. |
You will be prompted to confirm that you want to add the selected screen as a branch of the screen before it. |
After defining the branch, you can add more screens to it using the drag-and-drop feature.


