Step 1: Get started and record
|
1. |
Install HostFront Legacy Integrator. |
|
3. |
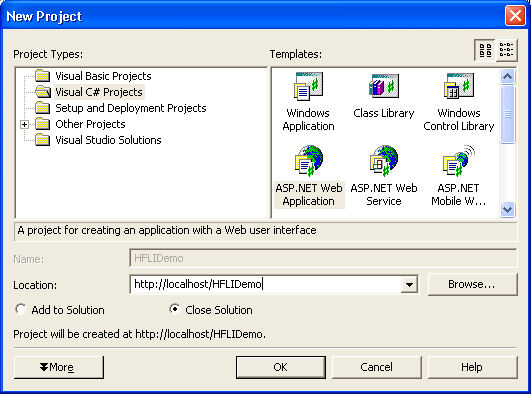
Start a new project – Windows C# ASP .NET Web Application.
|
|
4. |
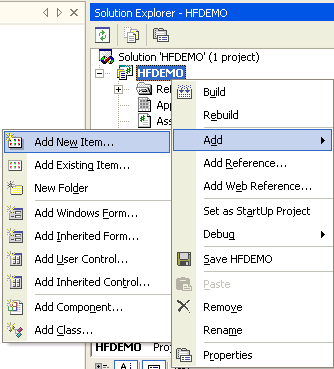
Right click on the project name in the solution explorer and select New item.
|
|
5. |
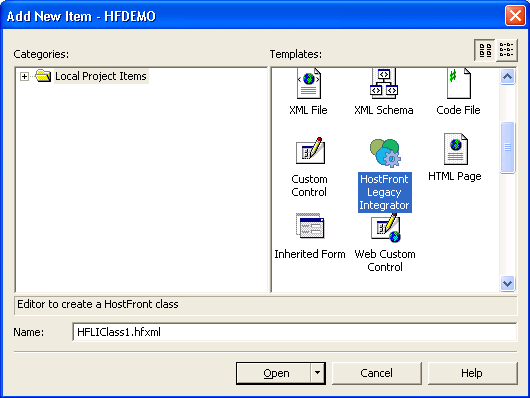
Select HFLI and click Open .
|
|
6. |
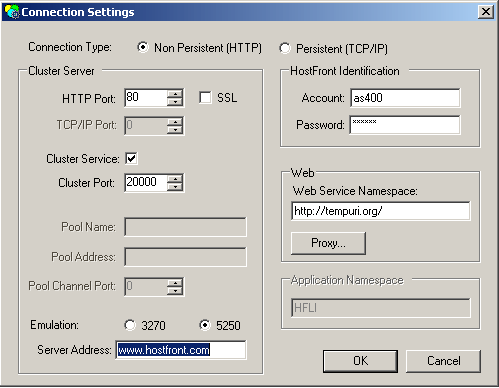
Click on the Connection Settings button.
 |
|
7. |
Fill in the following information:
|
• |
Server IP: www.hostfront.com |
|
|
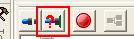
8. |
Click the record button.
|
|
9. |
Click the connect button.
|
|
10. |
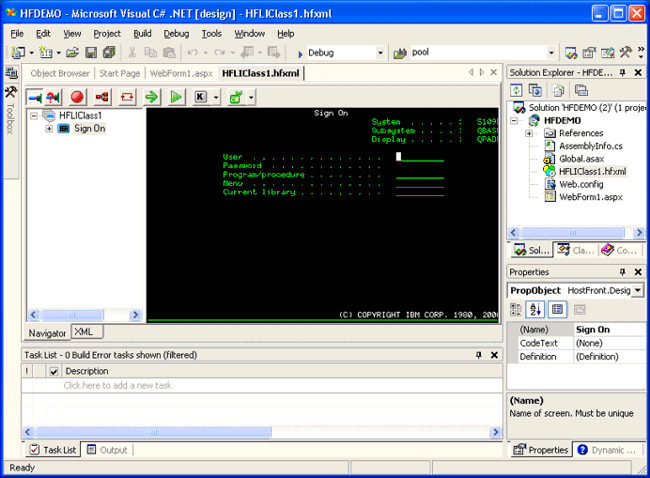
Now you should be connected to the AS/400 system and the following should be displayed on your screen:
The following instructions will guide you through the screens of the AS/400 application. Notice the recorded screen nodes
as you move along.
|
a. |
First screen: Sign on:
|
|
b. |
Possible warning message screen: depending who else is logged on to the same account at the test time, you might get a warning
message screen. Just press the Enter key and continue to the next screen.
|
|
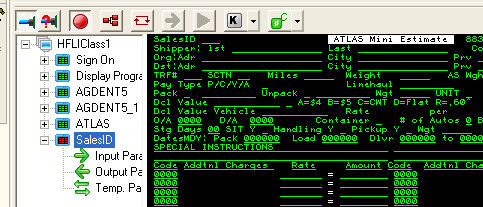
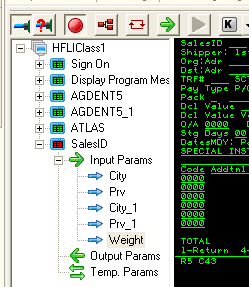
e. |
Estimate screen: This is the screen where we will define our inputs.
|
• |
In the left pane, expand the last screen (the SalesID screen) node which should also be red as it is the current active screen.
This should show you the following:
|
|
• |
Click inside the City field in row 3, hold down the CTRL key and drag the field into the Input Params node of the SalesID
screen
|
|
• |
Repeat the same operation for the Province field on row 3 and City and Province fields on line 4 and the Weight field on line
5.
|
|
• |
When you finished dragging the fields, the SalesID screen node will look as follows:
|
|
• |
Fill those fields on the green screen with the following information
|
♦ |
Montreal, QUE (for City, Province on row 3) |
|
♦ |
Toronto, ONT(for City, Province on row 4) |
|
♦ |
1000 (for weight on row 5) |
|
|
• |
Fill in the TRF# field on row 5 by: 031 |
|
• |
Fill in the SCTN field on row 5 by: 02 |
|
|
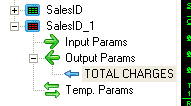
f. |
Result screen: This is the screen where we will get our output (the shipping estimation of from City 1 to City 2 as entered
on the previous screen)
|
• |
In the left pane, expand the last screen (the SalesID_1 screen) node which should also be red as it is the current active
screen.
|
|
• |
Click inside the Total Charges field (the field at location R=23, C=70 in the bottom right corner of the screen) |
|
• |
Hold down CTRL and drag the field to the Output node of the screen |
|
• |
The SalesID_1 screen node should look as follows:
|
|
|
|
11. |
Navigate back (to properly logoff from the AS/400 application)
|
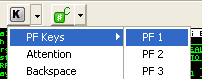
• |
From the toolbar, click on the Keyboard button and select Function keys -> F1
|
|
• |
Repeat the previous step with F7 |
|
|
12. |
Disconnect the session by clicking on the Connect button again. |
|
13. |
Save (click the Save All button in Visual Studio). |
|
14. |
The recording process is now completed and the code is generated. Notice the new file in the Solution Explorer in Visual Studio.
This is the web service code generated by the HFLI tool.
|
Step 2: Validate recording
|
1. |
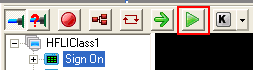
Select the first screen in the left pane (the Sign On screen). |
|
2. |
Click on the Green arrow key on the toolbar (the rectangle) to navigate one screen at a time.
|
|
3. |
Notice the flow of the screens. |
|
4. |
When you reach the results screen notice the output in the HostFront output panel below the green screen window. |
Step 3: Run the generated Web Service in Debug mode
|
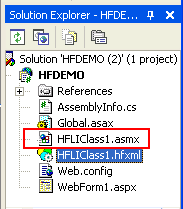
1. |
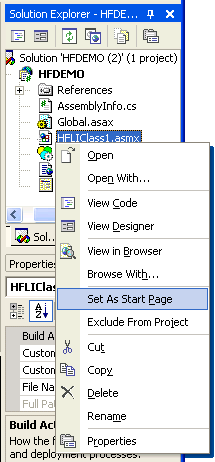
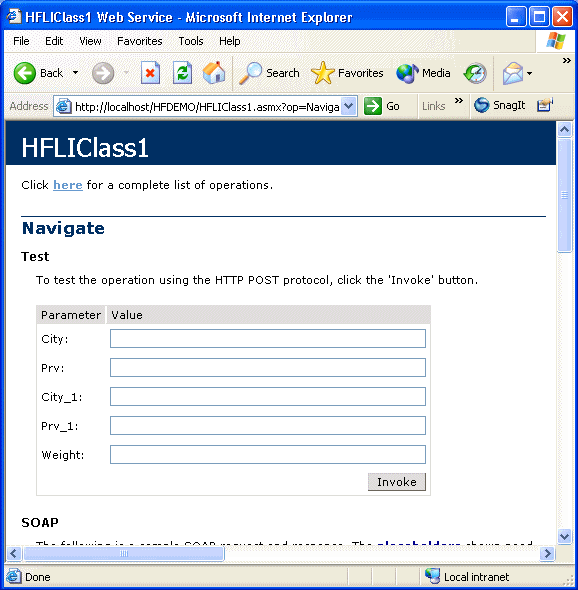
In the Solution Explorer, right-click on the HFLIClass1.asmx file and select Set As Start Page.
|
|
2. |
Click on the Start button in the Visual Studio toolbar. The browser will open with the Web service interface. |
|
3. |
Click on the Navigate link. You will get the following in your browser:
|
|
4. |
Fill in the Cities, provinces and the weight as follows (in order):
|
|
5. |
Click the Invoke button. |
|
6. |
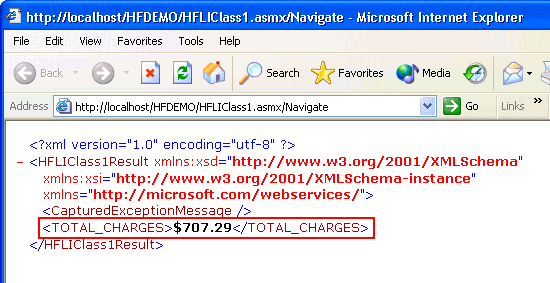
Notice the reply in XML format open in a new browser window.
|
Step 4: Publish the Web Service on another Web server
|
1. |
On the second web server, install the HostFront .NET integration components by running the HFLI.MSI file on that server and
select only the first option during the installation.
|
|
2. |
Copy the whole folder of the generated web service and paste it on the new web server. |
|
3. |
Write a small program that calls the web service with the 5 input parameters and read the single output. |
|
4. |
Run the program to validate. |