Configuring VT display sessions - profile mode
| 1. | Launch a BlueZone VT Display session from Session Manager or from the desktop icon. A dialog is displayed prompting you for a profile name for the session.
Note If this is the first time you are launching a BlueZone VT session, the following dialog is not displayed. Instead, a BlueZone
VT session launches and the Define New Connection dialog (shown below) automatically displays.
|
| 2. | In the File name field, type the desired name and click Save. BlueZone automatically assigns the correct file extension for the session type. |
| 3. | A message box opens asking you if you want to create the file. Click Yes. When the session launches, you are automatically taken to the Edit Connection dialog:
Figure 2: VT Edit Connection dialog 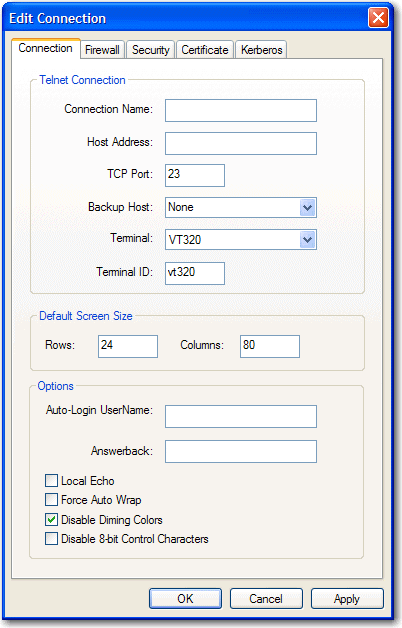 |
| 4. | Type your host's information. The Connection Name field can be any name you want. The Host Address can be an IP Address or a DNS Name. The key fields are Host Address and TCP Port.
|
| 5. | Click OK twice until you return to the BlueZone Display Emulation screen. |
| 6. | From the BlueZone VT menu bar, click . You are now connected to your host. Connected appears on the BlueZone status bar.
|
Additional configuration
You can also control the behavior of the host session you just created. By this we mean you can control many aspects of the
host session like auto-connecting and prompting on disconnect.
| 1. | From the BlueZone VT Display menu bar, click . The Session Configuration dialog opens. |
| 2. | From this dialog you can choose to Auto-Connect Session, Prompt on Disconnect and Auto-Close Session on Disconnect. |
There are additional configuration options that can be configured in this dialog. For additional information on Session Configuration,
refer to the BlueZone Display and Printer Help.