 SEE
How
to Automatically Generate Device Names for more information.
SEE
How
to Automatically Generate Device Names for more information.The RTN5250E.DLL file provides complete TN5250E connectivity for BlueZone allowing connection to hosts, servers, and gateways that are TN5250E compliant. TN5250E is the enhanced version of TN5250, providing more SNA information to the client for improved operation. Optionally, Secure Sockets Layer security is available to insure privacy, message integrity and provide authentication.
TN5250E configuration consists of the following tabs: Connections, Display, (Printer), Signon, Security, Certificate, Keep Alive, Trace, Firewall, Security Server and About. To quickly "jump" to anyone of these subjects, click the desired link.
NOTE The TN5250E settings for the BlueZone Display emulator are identical to the BlueZone Printer emulator with the exception that the BlueZone Display has a Display Tab, and the BlueZone Printer emulator has a Printer Tab.
This dialog displays your Host Connection list and contains buttons for creating new connections as well as editing, removing and sorting them.
TN5250/TN5250E Connections ----
Connection List: This is a list of your configured hosts (if any). A total of 32 connections may be specified.
New Button: Used to create new host sessions. When clicked, the Define New Connection dialog box will appear.
Connection Name: A unique name used to identify the collection of Connection settings.
Host Address: Specifies the computer name (in Internet format, known as DNS Name) or the IP address in either IPv4 or IPv6 format, of the TN3270E server.
Device Name: Specifies the name of the device to which to connect. This is optional.
SEE
How
to Automatically Generate Device Names for more information.
TCP Port: Specifies the TCP port number to which to connect. The default is 23.
Backup Host: Specifies a second host connection if the first connection attempt fails.
Enable TN5250E: Enables the TN5250E extensions. The default is enabled. This option should not be changed due to the fact that all iSeries printing must be TN5250E.
Connection Timer: Specifies the maximum amount of time (in seconds) to wait for the TN connection to complete.
Bypass Firewall: If enabled, individual connections can bypass the global firewall settings and connect directly to the host
Edit Button: Used to edit existing host connections that appear in the Connection List.
Remove Button: Used to remove existing host connections from the Connection List.
Sort Button: Used to sort the Connection List into alphabetical order.
Use Connection Name as Session Description: If checked, the name that you gave to the active connection, will appear in the BlueZone Title bar, immediately after the session number. This feature is handy if you have multiple hosts defined, and you are not using the "Connections" drop down list, and you want to know the name of the current connection.
TN5250E Display Properties ----
This feature allows you to override the following host properties in effect making a custom terminal definition from the client side of the connection:
Keyboard Type: Enter the desired Keyboard Type.
Code Page: Enter the desired Code Page.
Character Set: Enter the desired Character Set.
Request Startup Response Record: This is an optional feature that will cause the iSeries host to send a block of data which contains information on the TN5250 connection attempt. For example, the Device name that has been assigned to your session will be sent down from the host. When the Startup Response Record feature is enabled, the Device name will be displayed on the BlueZone StatusBar. If this option is not enabled, TN5250E will be displayed in the StatusBar in lieu of the Device name.
TN5250E Printer Properties ----
These fields are used when Auto-Creating printer devices on the iSeries. The required fields to Auto-Create a device will be noted in the following text:
*MSGQ Name: Used to specify the host *MSGQ name. (QSYSOPR is the default)
*MSGQ Library: Used to specify the host *MSGQ library. (*LIBL is the default)
Font: Used to specify the host font value. (011 is the default)
Host Print Transform: If checked Host Print Transform will be enabled.
 IMPORTANT! This
field may override the setting on the host system.
IMPORTANT! This
field may override the setting on the host system.
 NOTE
The following
options are only active when the Host
Print Transform box is checked.
NOTE
The following
options are only active when the Host
Print Transform box is checked.
Mfg. Type & Model: Used to specify the printer manufacturer, type and model for host print transform.
Custom Name: Used to specify the Custom Name. (QWPDEFAULT is the default)
Custom Library: Used to specify the Custom Library. (*LIBL is the default)
Formfeed ----
Choose the desired formfeed setting, Default, Continuous, Cut or Autocut.
Default: If selected, specifies the default formfeed setting should be used
Continuous: If selected, specifies the continuous forms setting should be used
Cut: If selected, specifies the cut forms setting should be used
Autocut: If selected, specifies the autocut forms setting should be used
NOTE The
Formfeed field is not a required
value for Auto-Creation. It is used to specify the host formfeed value.
Paper ----
Choose the desired Paper Sources from the three drop down lists.
Source 1: Choose the desired paper tray from the "drop down" box.
Source 2: Choose the desired paper tray from the "drop down" box.
Source 3: Choose the desired paper tray from the "drop down" box.
TN5250E Signon Information ----
This feature can be used in several ways. Here are some suggestions.
When you want to automatically send your User Name and Password, and possibly a specific program to run, or an initial menu or a specific library to use, upon connection to your iSeries host.
CAUTION!
If you
use this feature to automatically send your User Name and Password, you
should be aware that anyone who uses your machine to launch this iSeries
Display session, will be automatically logged in to your account.
When your iSeries operates as a public host, and you want to by-pass the main iSeries Sign On screen. You can configure a generic User Name and Password, as well as a specific program to call, Initial Menu and the Current Library to use, so that when a connection is made to the host, the information provided will be automatically passed to, and acted upon by the iSeries host.
When you want to force all passwords to be encrypted so that they are not sent in the clear. This feature is called Encrypted Substitute Password. This feature is enabled on the iSeries (by the iSeries Administrator) by setting QRMTSGN to *Verify.
When you want to enable Kerberos Single Signon to log onto an iSeries host using the end user's Windows credentials.
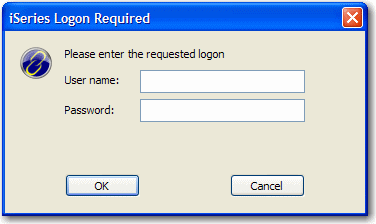
Force Encrypted Signon: If enabled, the End User will be presented a special User name and Password Dialog Box which will encrypt the password before sending it to the host, as shown here:
CAUTION! If
the sign on bypass fails or the End User signs off, the normal iSeries
log on screen will be presented. This
will defeat the purpose of Force Encrypted
Signon feature because at this point, the End User will be able
to sign on as they normally would, sending their password in the clear.
To prevent
this, an "exit" program should be used so that when an End User
signs off, BlueZone will automatically disconnect from the host.
User Name: Enter the desired User Name.
Password: Enter the desired Password.
NOTE When
the Force Encrypted Signon checkbox
is enabled, the Username and Password fields will be grayed out.
Program to Call: Enter the desired program to call. (Optional)
Initial Menu: Enter the desired Initial Menu to display. (Optional)
Current Library: Enter the desired Library to use. (Optional)
Signon Type: There are currently three choices.
DES Signon Bypass
SHA-1 Signon Bypass
NOTE This
feature requires OS/400 version V5R1 or higher. Also,
your iSeries Administrator must set the end user's password level (QPWDLVL)
to level 2 or 3.
Kerberos Single Signon - Enables Kerberos single signon to the iSeries using the end user's Windows credentials.
NOTE This
feature requires OS/400 V5R2M0 or higher and must be properly configured
for Kerberos SSO to work.
Fully-Qualified System Name: The fully-qualified name of the iSeries, such as "myiseries.mycompany.com". This is required only when Kerberos Single Signon is selected.
All BlueZone emulator clients support the SSL v3 or TLS v1 protocol through the BlueZone Security Server or any SSL enabled telnet connection including IBM Communications Server for NT (SSL v3 only), OS/390, z/OS, and the iSeries V4R4 or higher. BlueZone clients may be pre configured for distribution with SSL/TLS enabled, eliminating the need for any end-user intervention in the installation or configuration process. The options for configuration include
Security Options ----
If you want to encrypt your session, choose one of the following encryption
methods from the drop down listbox. The
method is dictated by the secure Telnet host that you are connecting to.
None: Choosing None Indicates that no encryption is being used.
Implicit SSL/TLS: This method negotiates a secure connection to the host first, then negotiates the Telnet connection.
NOTE For
users of BlueZone prior to version 5.1, when SSL/TLS encryption was enabled,
you were using Implicit SSL/TLS, even though the dialog did not expressly
state Implicit SSL/TLS encryption.
Explicit SSL/TLS: In this method, encryption is negotiated during the Telnet negotiation.
SSL
Version ----
Specifies which version of the SSL protocol should be used.
SSL v3: (Default)- Specifies that SSL version 3 should be used.
TLS v1: Specifies that TLS version 1 should be used.
NOTE SSL
v3 and TLS v1 are nearly
identical. TLS
v1 is preferred.
Invalid
Certificates ----
Specifies how to handle an invalid server certificate. Options include:
Always Reject: Specifies that an invalid server certificate should always be rejected.
Ask Before Accepting: (Default) Specifies that the user should be asked whether to accept an invalid server certificate.
Always Accept: Specifies that an invalid server certificate should always be accepted.
Preferred Cipher Suite: Specifies a specific SSL/TLS cipher suite (encryption algorithm) to use. To allow the client and server to negotiate the cipher suite, select "None".
NOTE This
product includes software developed by the OpenSSL Project for use in
the OpenSSL Toolkit (http://www.openssl.org/).
Client Certificate ----
These parameters specify the type of Client Certificate to use if any. Enable Secure Sockets Layer on the Security tab must be enabled in order for Client Certificate support to be active.
No Client Certificate: Specifies that a client certificate should not be presented.
Client Certificate in Disk File: Specifies that a client certificate should be presented.
Certificate File: Specifies the path to the Certificate File.
View: Use the View button to view the certificate.
Browse: Use the Browse button to locate the Certificate File.
Private Key File: Specifies the path to the Private Key File.
Browse: Use the browse button locate the Private Key File.
Client Certificate in Certificate Store: Specifies that a client certificate should be presented that is located in the Certificate Store.
Common Name: Specifies the path to the Common Name File.
View: Use the View button to view the certificate.
Browse: Use the browse button to display a list of certificates in the Certificate Store.
Client Certificate in Certificate on Smart Card : Specifies that a client certificate stored on a Smart Card should be presented.
Root Certificate ----
These parameters specify the which Root Certificate store to use. The one provided by OpenSSL, or the one that is provided by Windows.
Use OpenSSL Root Certifcates - (Default) If selected, the Root Certificates provided by OpenSSL will be used.
Use Windows Root Certificates - If selected, BlueZone will look will look for a file called rootcerts.pem in the End User's bluezone\certs directory. If it doesn't exist, it will automatically export the root certificates from Windows and store them there, giving a message such as ''109 root certificates were exported.''
Update Root Certificates - This button is used to manually export the certificates. If you connect and are presented with an untrusted host root certificate, and check the box to add it to the trusted list, it will import it into the Windows root store (which may produce a Windows message asking for confirmation), and then export the root store again to disk producing a message such as ''109 root certificates were exported.'' When this is performed one time, subsequent connections should connect without messages.
NOTE This
product includes software developed by the OpenSSL Project for use in
the OpenSSL Toolkit (http://www.openssl.org/).
These parameters specify whether the client should send keep-alive messages to the server to keep the TN3270E session active.
Timer Options ----
Disabled: Disables keep-alive messages. (Default)
Use NOP: Uses the Telnet NOP for keep-alive messages.
Use Timing Mark: Uses the Telnet Timing Mark (TM) for keep-alive messages.
Timer Value (Minutes): Specifies the time interval (in minutes) for sending keep-alive messages.
These parameters specify the interfaces to be traced and the file name to which the trace file will be written. The trace files are in ASCII text format and may be viewed with Note Pad or Word Pad.
 STEP-BY-STEP
How
to Capture a BlueZone Trace
STEP-BY-STEP
How
to Capture a BlueZone Trace
Trace Options ----
Trace Sockets Interface: Traces the data as it passes through the Winsock interface from the network connection.
Trace RUI Interface: Traces the data as it passes between the TN3270E driver and the BlueZone terminal session.
Trace SSL Connection: Traces the data as it passes through the Secure Sockets Layer component of the TN3270E driver.
Trace File: Specifies the file name to which the trace file will be written.
Browse: Displays a dialog used to select the directory and file name. BlueZone provides a Traces directory in the BlueZone installation directory.
CAUTION! This
must be a valid path or the trace feature will not work.
Trace Viewer: Specifies the program that will be used to read the trace file after it has been captured and written.
Browse: Displays a dialog used to select the directory and file name.
Start Trace: Used to manually start the trace.
Stop Trace: Used to stop the trace.
View Trace: Used to view the trace. BlueZone will automatically use the Trace Viewer program specified above.
The Firewall tab allows the configuration of Firewall and Proxy Server sign on systems.
Firewall Options ----
Connect Through Firewall or Proxy Server: Check to enable this feature.
Firewall
Type: Choose the Firewall Type from the drop down listbox.
SOCKS4 Proxy
SOCKS4A Proxy
SOCKS5 Proxy
NVT Proxy or Firewall
HTTP Tunneling Proxy
Firewall Address: Enter the IP address of the Firewall. Can be DNS name or IP address.
Port: Enter the Port number used by the Firewall.
Timeout: Enter the appropriate Time out value.
User Name: Enter the appropriate User Name.
Password: Enter the appropriate Password.
Domain: Enter the appropriate Domain.
NOTE
If you
have chosen NVT Proxy or Firewall, then you will need to provide the following
additional information:
Host Name Prompt: Enter Firewall of network prompts BlueZone should look for.
User Name Prompt: Enter the User Name that the Firewall is expecting.
Password Prompt: Enter the Password that the Firewall is expecting.
Connected Prompt: Enter the appropriate Connected message that the Firewall transmits.
The Security Server tab is used to configure BlueZone to use the BlueZone Security Server as a Proxy Server to multiple hosts. This feature enables you to support connecting to multiple "back end" hosts through a single port in the BlueZone Security Server while using HTTPS tunneling in BlueZone.
Security Server Options ----
Use Security Server to proxy to Multiple Hosts: Enable
Proxy Type: Choose the desired Proxy Type from the listbox.
Security Server Address: Enter the IP address of the Security Server.
Port: Enter the Port being used by the Security Server for these connections.
Timeout: The time (in seconds) after which, if a prompt from the Firewall has not been received, BlueZone will assume that the Firewall has been traversed and proceed with the next stage of the connection process. This is required for Firewalls which authenticate a user once but then do not re-authenticate on subsequent connections within a certain time period.
This tab is used to display information about the encryption technology used by BlueZone.
Related Topics:
Establish a Secure Host Session