 Connecting to the Host
System
Connecting to the Host
System Connecting to the Host
System
The UTS Connection Configuration dialog is used to control the overall operation of the configuration process and to configure routes to a host visually. The dialog contains a work area where routes and virtual destinations (hosts) may be easily linked together with the use of a mouse.
Configuring a host connection requires the following steps:
Launching the UTS Connection Configuration Dialog
Editing the Default Route
Editing the Default Open Id
Editing the Default Virtual Destination
Selecting a Connection Route
From the BlueZone MenuBar, choose Session:Configure. The Session Configuration dialog will appear.
Click the Configure button located to the right. The UTS Terminal Configuration Settings dialog will now be displayed.
Click the Configure Connections button.
 NOTE The
first time you access this dialog, you will receive the following message:
NOTE The
first time you access this dialog, you will receive the following message:
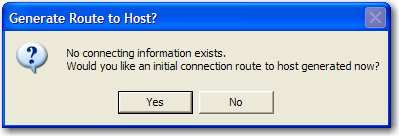
Click the Yes button to generate a route now.
The UTS Connection Configuration dialog will now be displayed.
The work area is divided into three columns; one to configure routes, one to configure open Ids, and a one to configure virtual destinations.
The following is an example of the default UTS Connection Configuration dialog:

The first step in configuring a host connection, is to edit the default Route.
Click the Edit button and select Route Actions:Edit. Or, double click the DEMAND1 button. The Edit Route dialog will be displayed.

Edit the following information as needed:
Route Name: Route Name is used to link to a virtual destination on the BlueZone UTS Visual Configuration window. One route must be configured for each environment that is to be connected.
Station Name: In this text box, enter a station name. The station name may be any meaningful name.
Select Open Id: From the drop-down list box, choose a configured Open Id to which the route is to be linked.
Use QPlex Generated Station Name: Check this box if QPlex is being used as a gateway and QPlex will generate the station names.
Terminal Type: From this drop-down list box, choose the terminal type: TERMINAL or PRINTER.
Rows: In this box, enter the number of rows. The number of rows is limited to the range of 12 through 50. There will always be one more line for the status line. The default is 24.
Columns: In this box, enter the number of columns. Columns are limited to the range of 60 through 132 The default is 80.
Auto Open Session: Check this box to indicate that the session should be automatically opened when this Route is selected by an application.
Aux DIDs (Hex): These are the DIDs (Device Identifiers) of auxiliary devices that are assumed to be connected to this station.
Aux TCS DIDs (Hex): This group defines the two pseudo-device identifiers (DIDs) used for MAPPER® file transfer. The value must be hexadecimal in the range 73 to 7E. These same DIDs must also be configured in MAPPER as the DIDs associated with the TCS (tape cassette) device.
NOTE Your
communications administrator or MAPPER administrator can tell you which
DIDs are configured for your use.
OK: Click this button to accept changes made and close the window.
Cancel: Click this button to discard any changes made and close the window.
Once you have the Route configured, the second step is to edit the default Open Id.
Click the Edit button and select Open Id Actions:Edit. Or, double click the DEMAND button. The Edit Open Id dialog will be displayed.
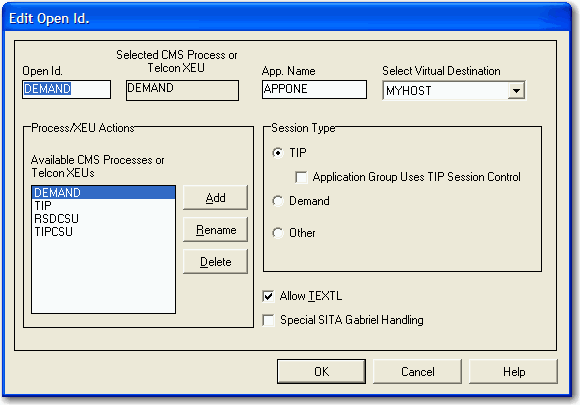
Edit the following information as needed:
Open Id: This required name is used to define a connection, IP Address (see Virtual Destination) and Session Type (TIP, DEMAND, NMS, etc.), to a host. This name is a user-defined name and, as such, may be anything meaningful to the user.
The Open Id name specified here has no required relationship to the "$$OPEN open-id" required for non communications; however, using the same name as required on the "$$OPEN open-id" for non communications may be the best option when converting users to TCP/IP. Using the same name will allow users to continue using familiar $$OPEN statements.
The Open Id name will be used by selected routes for default session establishment.
NOTE Just
because a Route is visually connected to an Open Id on the UTS Connection
Configuration dialog, it does not prevent the user from performing a $$OPEN
to another Open Id.
Selected CMS Process or Telcon XEU: This field is used to indicate the remote TSAP of a connection.
BlueZone UTS uses the CMS Process or Telcon XEU Name, along with the IP Address, to link to a DEMAND or TIP session (or any other valid termination system).
If the Open Id connects to a Virtual Destination with a Connect Type of "TP0 to HLC, or through DCP as IP Router", the Selected CMS Process or Telcon XEU is the PROCESS name in the CMS1100 configuration.
Typical values are:
CMS Process
TIPCSU for TIP
RSDCSU for DEMAND
CSACSU for CMS1100 network administration
If the Open Id connects to a Virtual Destination with a Connect Type of "TP0 to a DCP as a DCA TS", this is the name of an XEU statement in the Telcon configuration. The XEU statements can indicate a connection to destinations on various hosts and DCPs. The DCP destinations can include DCP/OS, TOMF and System 80, as well as more common ones like TIP and DEMAND.
App. Group Name: This is the name of the application to be accessed when the session is to TIPCSU or CSACSU. This name is the name of an APPLICATION statement in the CMS1100 configuration (this field is only valid for PROCESS TIPCSU and CSACSU — it is ignored for other PROCESSes and XEUs).
Selected Virtual Destination: Select from the drop-down list box to link this open id to a configured virtual destination. Selecting "<None>" unlinks the open id. from the virtual destination.
Process/XEU Actions: This group of command buttons may be used to configure a new CMS Process or Telcon XEU name (Add button). Two other buttons, Rename and Delete, may be used to change or drop the name from the "Available" list.
Available CMS Processes or Telcon XEUs: Use the mouse to select from this list and change the Selected CMS Process or Telcon XEU parameter.
Session Type: The controls in this group are only required if your site is using the Unisys Single Point Sign-on feature.
TIP: Select this option if the Open Id will be used to access TIP sessions with the Single Point Sign-on feature.
Application Group Use TIP Session Control: Check this box if your site has TIP Session Control and you are utilizing the Single Sign-On feature.
Demand: Select this option if the Open Id will be used to access DEMAND sessions utilizing the Single Point Sign-on feature.
Other: Select this option if the Open Id will be used to access other session types utilizing the Single Point Sign-on feature. Currently, the only other type supported is for a console.
Allow TEXTL: Leave this check box checked unless access is to a SYSTEM 80.
Special SITA Gabriel Handling: Check this box only if you are connecting to a SITA Gabriel host.
OK: Click this button to accept changes made and close the window.
Cancel: Click this button to discard any changes made and close the window.
Click the OK button to exit the dialog.
Once you have the default Open Id configured, the third step is to edit the default Virtual Destination. This is where you configure your Host information.
Click the Edit button and select Virtual Destination Actions:Edit. Or, double click the MYHOST button. The Edit Virtual Destination dialog will be displayed.
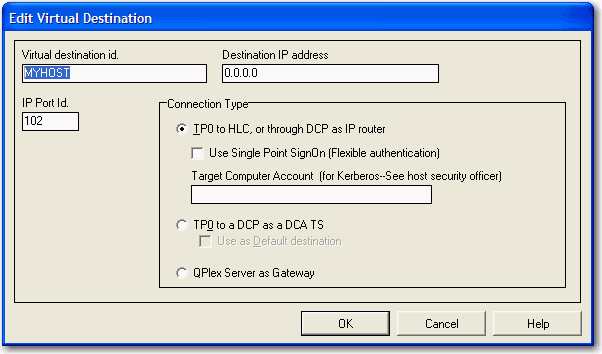
Edit the following information as needed:
Virtual Destination Id: This is the name of the Virtual Destination being configured. It will be used to link to a route on the BlueZone UTS Visual Configuration window.
IP Address: In this text box, enter an IP address (in "dotted" notation or symbolic destination machine name) of a host.
NOTE When
using a QPlex Server as a gateway, use the IP Address of the QPlex Server.
IP Port Id: This text box contains the port address to the host. This number is normally 23.
Connection Type: UNISYS (A-Series), UNIGATE (V-Series), Local (PCA) and QPlex Server as Gateway are currently the supported connection types.
OK: Click this button to accept changes made and close the window.
Cancel: Click this button to discard any changes made and close the window.
Click the OK button to exit the dialog.
Click the Save and Close button to exit the UTS Connection Configuration dialog.
Once the Route and Virtual Destinations have been configured, you must select a Connection Route.
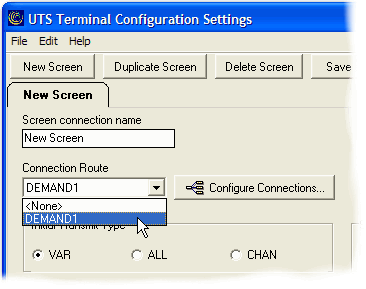
Make sure that you are in the UTS Terminal Configuration Settings dialog.
From the Connection Route drop-down listbox, select a Route that you edited or created in the above exercise as shown here:
Click the Save and Close button to exit the dialog.
Click the OK button to exit the Session Configuration dialog.
You should now be able to connect to your host system.
 SEE How
to Establish a Host Connection for more information.
SEE How
to Establish a Host Connection for more information.
Related Topics:
How to Establish a Host Connection