 IMPORTANT! This
procedure is for pre-3.3 versions of BlueZone Web-to-Host only!
IMPORTANT! This
procedure is for pre-3.3 versions of BlueZone Web-to-Host only!
|
Installation |
BlueZone Web-to-Host |
IMPORTANT! This
procedure is for pre-3.3 versions of BlueZone Web-to-Host only!
The procedure assumes that you have a pre-3.3 version of BlueZone Web-to-Host installed, and you wish to manually upgrade your installation to the current version and you do not want to convert over to the new Web-to-Host Wizard. Also, it assumes that you are very familiar with your current BlueZone Web-to-Host installation and the operation of your web server.
Some BlueZone Web-to-Host Customers have made extensive customization changes to their Web-to-Host installations. For example, you may have made web page and file structure changes in order to incorporate BlueZone Web-to-Host into a portal web site. If this is the case, you can still upgrade to the current version by manually copying the necessary files from the current BlueZone Web-to-Host CD-ROM or image, to the proper locations in your current BlueZone Web-to-Host structure.
 NOTE If
you are going to be using any of the new BlueZone emulators that were
introduced in version 4.0, like ICL 7561, Unisys T27 and Unisys UTS, we
don't recommend manually upgrading your existing installation. However,
it is still possible to manually incorporate the new emulators into an
existing BlueZone Web-to-Host installation. Please
contact Seagull Software Customer Care for assistance.
NOTE If
you are going to be using any of the new BlueZone emulators that were
introduced in version 4.0, like ICL 7561, Unisys T27 and Unisys UTS, we
don't recommend manually upgrading your existing installation. However,
it is still possible to manually incorporate the new emulators into an
existing BlueZone Web-to-Host installation. Please
contact Seagull Software Customer Care for assistance.
Starting with version 4.0, the BlueZone Web-to-Host folder in the BlueZone CD image, does not contain folders for the CAB files and the Web-to-Host Control files, as in the past. In version 4.0, these files are stored internally, and can only be accessed after the new Web-to-Host Wizard 4.0 is installed and at least one Site is created.
So even though you are not going to use the new Web-to-Host Wizard to upgrade and maintain your current installation, you still have to install the new BlueZone Web-to-Host Wizard 4.0 on a Windows 2000 or higher machine. This step is necessary so that you will have access to the new BlueZone Web-to-Host files.
We highly recommend that you make a backup copy of your current BlueZone Web-to-Host installation before attempting the upgrade.
Once the new BlueZone Web-to-Host Wizard 4.0 is installed and you have access to the new BlueZone Web-to-Host files, you will copy the new Web-to-Host files to the backup copy of your current installation.
Finally, you will edit your current Distribution Files and Object Tags to conform to version 4.0.
NOTE
This procedure
covers the upgrading of all the BlueZone emulators that were available
in BlueZone Web-to-Host version 3.2 and older. If
for example, you only use BlueZone Mainframe Display and Printer, you
only have to upgrade the files associated with BlueZone Mainframe Display
and Printer. You
do not have to upgrade the files located in the bz5250, bzFTP, and bzVT
folders.
The upgrade procedure can be broken down into the following parts:
Install the BlueZone Web-to-Host Wizard 4.0 on a Windows 2000 (or higher) machine.
Using the new BlueZone Web-to-Host Wizard 4.0, create a Site. The process of creating a Site will create a folder which will contain the new Web-to-Host files needed to upgrade your current installation.
Make a complete copy of your current BlueZone Web-to-Host installation by manually copying your current Web-to-Host files to a new location on your web server. You will be performing the upgrade on this backup version so that you are not upgrading your current live installation.
From the Site folder of the new Web-to-Host Wizard 4.0 installation, copy the new CAB files, Control files and miscellaneous files, to the backup copy of your current Web-to-Host installation.
Edit your Distribution files with the new CAB file names.
Edit your INI files with several new entries to support new version 4.0 features.
Edit your Object Tags with the new version.
Following this outline, you will be able to test the backup copy of your Web-to-Host installation for proper operation before making the copy available as your production installation.
Choose a Windows 2000 (or higher) machine for the installation of the Web-to-Host Wizard.
NOTE
If your
current BlueZone Web-to-Host installation is currently being served up
from a Microsoft web server, you can install the new Web-to-Host Wizard
4.0 on this same server. This
is the recommended approach. It
will not interfere with your current Web-to-Host Installation.
Place the BlueZone version 4.0 CD-ROM in the CD drive. It will auto-run the BlueZone DemoShield and display the Welcome to BlueZone Splash screen.
Click the BlueZone Web-to-Host button. Several items will be displayed.
Choose the BlueZone Web-to-Host link. The BlueZone Web-to-Host setup program will launch.
During the installation, respond to any questions using the default values. The Web-to-Host Wizard will be installed in the following location:
C:\Program Files\SEAGULL\BlueZone Web-to-Host\4.0\
Launch the BlueZone Web-to-Host Wizard by double clicking the desktop shortcut that was placed on your desktop during the installation. Once it is launched, the Sites page will automatically be displayed. The Sites listing will be blank.
Create a Site by clicking the Create button. A Windows file dialog will be displayed with the default path for the location of the Site as shown here:
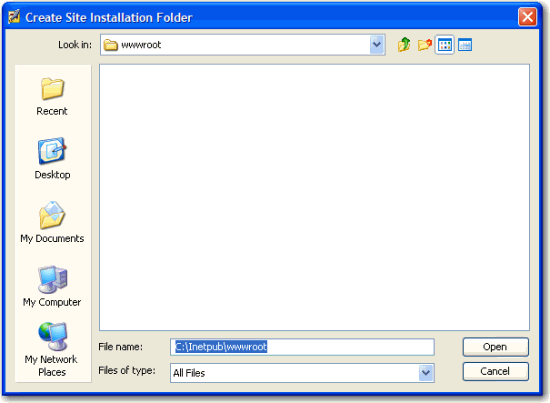
NOTE
The default
location will vary depending on whether or not the Wizard detected a web
server running on this machine.
Give the Site a name by adding it onto the end of the default path as shown here:
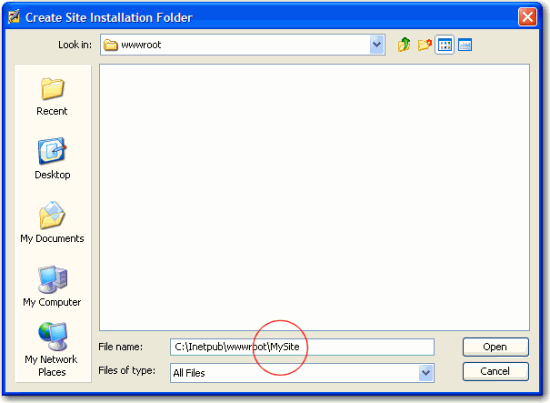
Click the Open button. In this example, the Web-to-Host Wizard 4.0 will create a Site folder called 'MySite". This is the folder where the new Web-to-Host files that you will use to upgrade your current installation are located.
On your web server, copy your current BlueZone Web-to-Host installation to a new location. For example, if your current installation is located here:
C:\inetpub\wwwroot\bluezone
Copy the bluezone folder to bluezone1.
C:\inetpub\wwwroot\bluezone1
Your folder file structure of "bluezone1" should look like this: (unless it was previously customized)
assets
bz3270
bz5250
bzftp
bzvt
docs
options
Copy the BlueZone CAB files from the Site folder of your Web-to-Host Wizard 4.0 installation (MySite\cabs) to the appropriate Product Folders in "bluezone1". In "bluezone1", the CAB files are stored in the corresponding Product Folder. For example, copy the bzmd.cab file to the bz3270 folder on "bluezone1".
NOTE
In addition
to the CAB files shown in the following list, the MySite\cabs folder will
contain several additional CAB files that are new to BlueZone Web-to-Host
version 4.0. These
additional CAB files do not have to be copied to "bluezone1",
and can be ignored.
The following table shows where the CAB files need to be copied:
|
Emulator Name |
File Name |
From |
To |
|
iSeries Display |
bzad.cab |
cabs |
bz5250 folder |
|
iSeries Printer |
bzap.cab |
cabs |
bz5250 folder |
|
BlueZone FTP |
bzftp.cab |
cabs |
bzftp folder and options folder |
|
Mainframe Display |
bzmd.cab |
cabs |
bz3270 folder |
|
Mainframe Printer |
bzmp.cab |
cabs |
bz3270 folder |
|
Scripting CAB |
bzsc.cab |
cabs |
options folder |
|
Scripting Player Only CAB |
bzscp.cab |
cabs |
options folder |
|
BlueZone VT |
bzvt.cab |
cabs |
bzVT folder |
You can delete the old CAB files (like bzmd32C5.cab) since they will no longer be used.
Copy the Web-to-Host Control Module files from the Site folder of your Web-to-Host Wizard 4.0 installation (MySite\controls) to the root of "bluezone1". In "bluezone1", the Control Module files are stored in the "root". For example, copy the sglw2hcm.jar to the "root" of "bluezone1".
The following table shows where the Control Module files need to be copied:
|
File Name |
From |
To |
|
sglw2hcm.jar |
controls |
root |
|
sglw2hcm.ocx |
controls |
root |
|
sglw2hcm.xpi |
controls |
root |
|
sglw2hjv.jar |
controls |
root |
|
sglw2hjv-signed.jar |
controls |
root |
Copy the following miscellaneous files from the Site folder of your Web-to-Host Wizard 4.0 installation (MySite and MySite\shared) to their proper locations as shown here:
|
File Name |
From |
To |
|
bzstring.dll * |
root |
root |
|
ezclear.exe |
root |
root |
|
bzprndef.ini |
shared |
bz3270 and bz5250 folders |
|
bzsm.ex_ |
shared |
options |
|
dbcsxlat.dl_ |
shared |
options |
|
seaglapl.ttf |
shared |
bz3270 |
|
spoolinf.ex_ |
shared |
options |
|
unins.ex_ |
shared |
options |
* This is a new file that did not exist before version 4.0
CAUTION Do
not copy the seagull.saf file from the Site
folder of your Web-to-Host Wizard 4.0 installation (MySite folder). You
need to continue to use your current saegull.saf file that was copied
from your production installation.
In each Product Folder on "bluezone1", you will find one or more Distributions Files. The Distribution File is used to tell the Web-to-Host Control Module what files to download. For example in the bz3270 folder there are at least two Distribution Files. display.e3d and printer.e3d. Use Notepad to edit these files as shown here:
Here is an example of the display.e3d file with the CAB file name shown in blue:
bzmd32C5.cab,1
mfdisp1.zmd,1
seaglapl.ttf,1
../seagull.saf,1
Edit the name of your CAB files as shown. The version number is no longer used in the CAB file name. Also, add the bzstring.dll file to the end of the list as shown in red:
bzmd.cab,1
mfdisp1.zmd,1
seaglapl.ttf,1
../seagull.saf,1
../bzstring.dll,1
NOTE If
your current installation has been customized, your Distribution Files
may look different from the example. Also,
you may have additional Distribution Files. Make sure that
you update ALL Distribution Files located in ALL the Product Folders
with the new CAB file names.
Using Notepad, edit your default.ini file and add the following lines shown in blue, to the [BlueZone] section as shown here:
[BlueZone]
RegistrationKey=
;0-Application Settings in HKEY_LOCAL_MACHINE, Session Settings in HKEY_CURRENT_USER
;1-All Settings in HKEY_LOCAL_MACHINE
;2-All Settings in HKEY_CURRENT_USER (default mode)
BaseRegistry=2
UsePersonalFolderAsWorkingDir=Yes
UseAllUsersCommonFolderAsWorkingDir=No
ProfileMode=Yes
ProfileSharing=Yes
;DesktopMode=desktop.ini
EnablePowerKeys=No
Further down the page in the [Configuration Lock Feature] section, add the following lines shown in blue.
[Configuration Lock Feature]
Lock=0
LockFTP=0
LockTelnet=0
ShowLockedDialogs=Yes
DisableAppendToClipboard=No
Now add this new [Session Manager] section below the [Configuration Lock Feature] section:
[Session Manager]
AutoUpdate=Yes
NOTE If
you are upgrading from a very old version of BlueZone Web-to-Host, you
may have to add additional lines to your default.ini file. So
look it over very carefully.
Update all your Object Tag pages with the following ActiveX Control Module version. Each BlueZone Product Folder contains several Object Tag pages. These are the pages that start with obj_.
You must edit these pages with Notepad and change the OCX version number. For example, in the bz3270 folder each HTML page that begins with obj_ has an Object Tag and must be updated.
Here is an example of the obj_d_3.htm file with the OCX version shown in blue:
<OBJECT ID="Seagull Web-to-Host Control Module v3"
CLASSID="clsid:037790A6-1576-11D6-903D-00105AABADD3"
CODEBASE="../sglw2hcm.ocx#Version=3,2,5,362" HEIGHT=0 WIDTH=0>
<PARAM NAME="IniFile" VALUE="default.ini">
<PARAM NAME="Sessions" VALUE="MD_S1">
<PARAM NAME="MD_DistFile" VALUE="display.e3d">
<PARAM NAME="MD_S1" VALUE="mfdisp1.zmd">
<PARAM NAME="MD_S1_Save" VALUE="Yes">
</OBJECT>
Change the OCX version to look like this (changes are shown in red):
<OBJECT ID="Seagull Web-to-Host Control Module v3"
CLASSID="clsid:037790A6-1576-11D6-903D-00105AABADD3"
CODEBASE="../sglw2hcm.ocx#Version=-1,-1,-1,-1" HEIGHT=0 WIDTH=0>
<PARAM NAME="IniFile" VALUE="default.ini">
<PARAM NAME="Sessions" VALUE="MD_S1">
<PARAM NAME="MD_DistFile" VALUE="display.e3d">
<PARAM NAME="MD_S1" VALUE="mfdisp1.zmd">
<PARAM NAME="MD_S1_Save" VALUE="Yes">
</OBJECT>
NOTE Make
sure you update ALL your Object
Tag pages.
When all the above changes are complete, test your "bluezone1" site and make sure everything is working properly.
Congratulations! You have successfully upgraded your BlueZone Web-to-Host installation.