
|
Web-to-Host Wizard |
BlueZone Web-to-Host |
The purpose of this tutorial is to walk you through the complete process of creating a Launch Page that will launch one BlueZone emulation client session of your choice, which will connect to your host. We will not be discussing any of BlueZone Web-to-Host's advanced features here.
Launch the Web-to-Host Wizard by double clicking the BlueZone Web-to-Host Wizard desktop icon that was created during the installation process. The main Web-to-Host Wizard will be displayed as shown here:
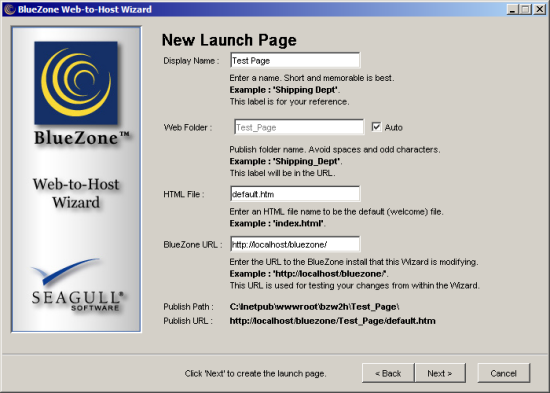
Click the New button ("Create new launch page"). The New Launch Page dialog will be displayed as shown here:
![]()
Give the new Launch Page name. Call it Test Page. When the Auto checkbox next to Web Folder is checked, the Wizard will automatically give the web folder the same name as the Display Name as shown here:
Click the Next button. The Add Session page will be displayed as shown here:
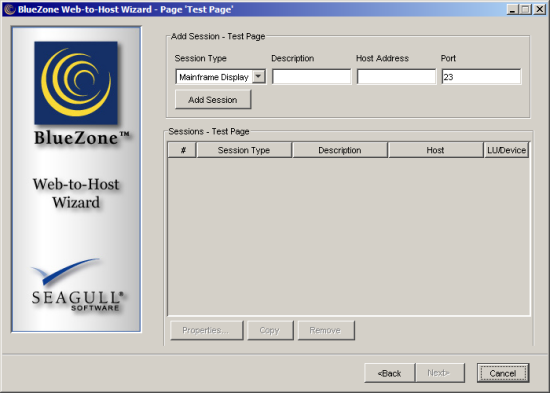
Choose the type of session you wish to create from the Session Type list box. The default is Mainframe Display. Your choices are:
Mainframe Display
Mainframe Printer
iSeries Display
iSeries Printer
File Transfer - BlueZone FTP
Virtual Terminal - BlueZone VT
TCP/IP Print Server
Fill in Description, Host Address (can be an IP address or DNS name), and change the TCP Port if needed, as shown here:
 NOTE If
you choose TCP/IP Print Server, you will not be able to fill in Description,
Host Address or Port since they are not used with this product.
NOTE If
you choose TCP/IP Print Server, you will not be able to fill in Description,
Host Address or Port since they are not used with this product.

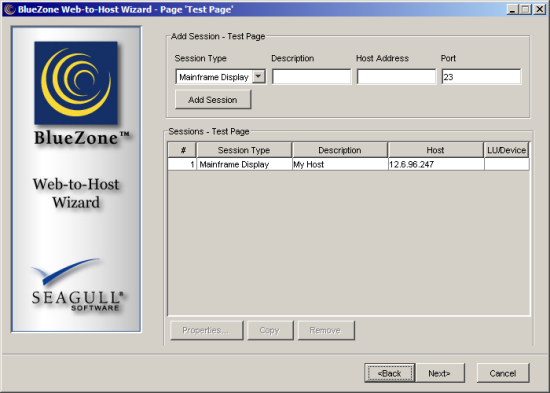
Click the Add Session button. The session will be created and will appear in the Sessions box as shown here:
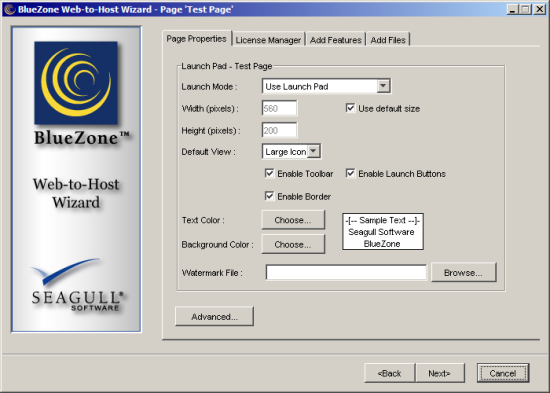
Click the Next button. A dialog with several tabs will be displayed as shown here:
Click the Next button. The Publish dialog will be displayed as shown here:
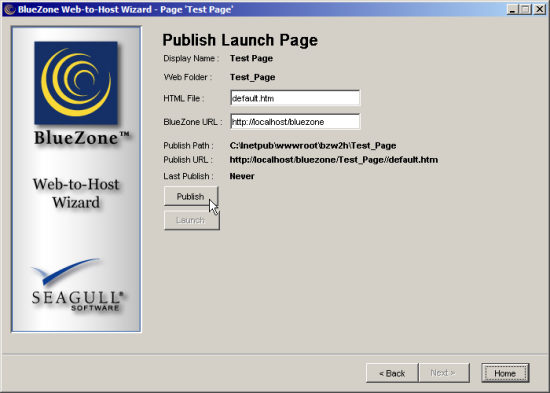
Click the Publish button. The Launch Page that you just created, will be published to the location shown. When the publishing process is complete, you will see the following message:
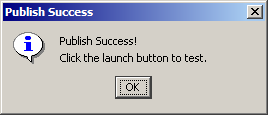
Click the OK button.
To launch the page, click the Launch button as shown here:

The Launch Page that you created will be displayed. After a few seconds you will be presented with a Security Warning asking if you want to download and run the Seagull Web-to-Host Control Module v3 as shown here:
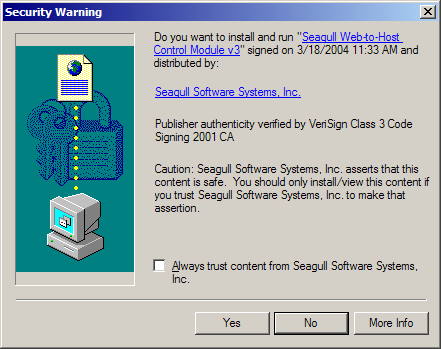
Click the Yes button. The Seagull Web-to-Host Control Module will download and install, followed by the BlueZone emulation client files. The Launch Page you created page will contain the BlueZone Web-to-Host Launch Pad with an icon representing the BlueZone session that you created.

To launch the session you created, double click the session icon. You will be presented with another Security Warning asking if you want to install and run "BlueZone Mainframe Display" emulation client (or whatever client you configured) as shown here:

Click the Yes button. The BlueZone session will immediately launch and connect to your host.
NOTE
These Security
Warnings will only be presented the first time you download and launch
a particular BlueZone emulation session.
To end your session and exit from the Wizard, click the Home button located in the lower right hand corner. You will be taken back to the Wizard's main page. Click the Quit button to exit the Wizard.
Congratulations! You have successfully created and launched your first BlueZone session using the Web-to-Host Wizard.
NOTE
The Basic
Tutorial does not cover configuring BlueZone's more advance features like
changing the color of the display or the size and position of BlueZone
when it launches.
 SEE How
to Make Changes to BlueZone's Default Configuration for help with
customizing the BlueZone configuration file for your application.
SEE How
to Make Changes to BlueZone's Default Configuration for help with
customizing the BlueZone configuration file for your application.
How to Make Changes to BlueZone's Default Configuration