 Using Session ManagerUsing Session Manager
A Session Layout is a feature that allows you to associate two or more existing BlueZone sessions with one Session Manager icon. For example, if you wanted to launch a Mainframe Display and a Mainframe Printer session with one Session Manager icon, you would create a Session Layout which includes both of these sessions.
In addition, you can also create Desktop Shortcut Icon for a Session Layout.
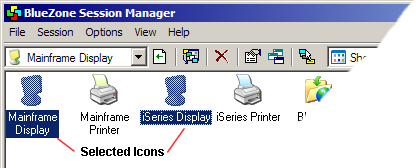
Select the desired BlueZone sessions that you want to add to the Layout. For example, to select multiple sessions, hold down the Control (CTRL) key while using your mouse pointer to select the desired BlueZone Sessions, then release the Control key.
The following is an example of Session Manager with the Mainframe Display and the iSeries Display icons selected:
When you have all the
desired BlueZone sessions selected, click the Create
Session Layout button ![]() . A
Windows File Name dialog will be displayed.
. A
Windows File Name dialog will be displayed.
Give the Session Layout a name and click the Save button.
 NOTE
The BlueZone
Session Manager will automatically assign the file extension of .ZLT and
place this file in the BlueZone Config folder.
NOTE
The BlueZone
Session Manager will automatically assign the file extension of .ZLT and
place this file in the BlueZone Config folder.
A Session Layout icon will be created in Session Manager using the file name as the label as shown here:
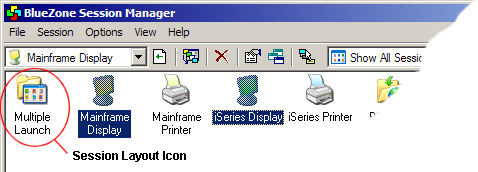
In the above example, a Session Layout was created using the name Multiple Launch. The Multiple Launch Layout icon was created by selecting the Mainframe Display and the iSeries Display session.
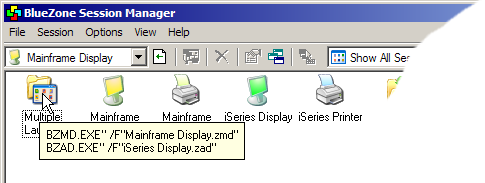
Double click the newly created Session Layout icon to launch the sessions.
NOTE If
you place you mouse pointer over the newly created Session Layout icon,
a Tooltip information window will be displayed with the contents of the
Layout icon.
You now have the option of creating a Desktop Shortcut icon which will launch the newly created Multiple Launch Session Layout.
 SEE Creating
a Desktop Shortcut Icon for more information.
SEE Creating
a Desktop Shortcut Icon for more information.
Creating a Desktop Shortcut Icon