The SEAGULL Security Server Manager may be configured to manage one or more SEAGULL Security Servers using standard Windows Networking.
Launch the Security Server Manager by double clicking the Security Server Manager desktop icon that was created during the installation process.
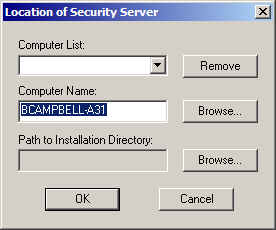
The first time you start the Security Server, you will be presented with a blank dialog box (except for Computer Name) as shown in the following example:
Click the Browse button located next to the “Path to Installation Directory” window and browse to the folder where the Security Server is installed and click the OK button.
 NOTE
If you
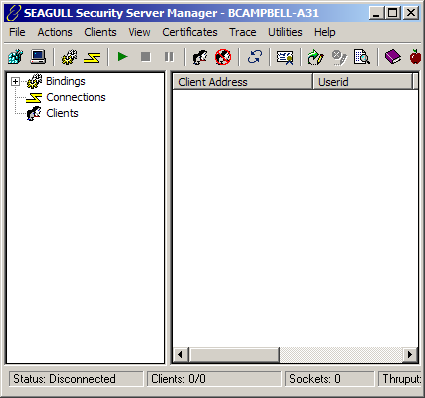
have already run the SEAGULL Registration Wizard, the SEAGULL Security
Server Manager will now start, and you will be presented with the Security
Server Manager Console as shown below.
NOTE
If you
have already run the SEAGULL Registration Wizard, the SEAGULL Security
Server Manager will now start, and you will be presented with the Security
Server Manager Console as shown below.
If you did not previously install the Seagull Activation File, or if you are running the Seagull Security Server in “evaluation mode”, the following message will be displayed:

Click the No button. You will receive the following message:
![]()
Click the OK button. The Security Server Manager will launch and the Security Server will run in the “evaluation” mode. You will be presented with the Security Server Manager Console as shown here:
Congratulations! This completes the installation of the Security Server Service and the Security Server Manager.
Starting and Stopping the Server